Building a One-Key Keyboard

Table of Contents
First off, I apologize for the lack of pictures here, I didn’t think to write this post until I had already completed everything.
The Switch
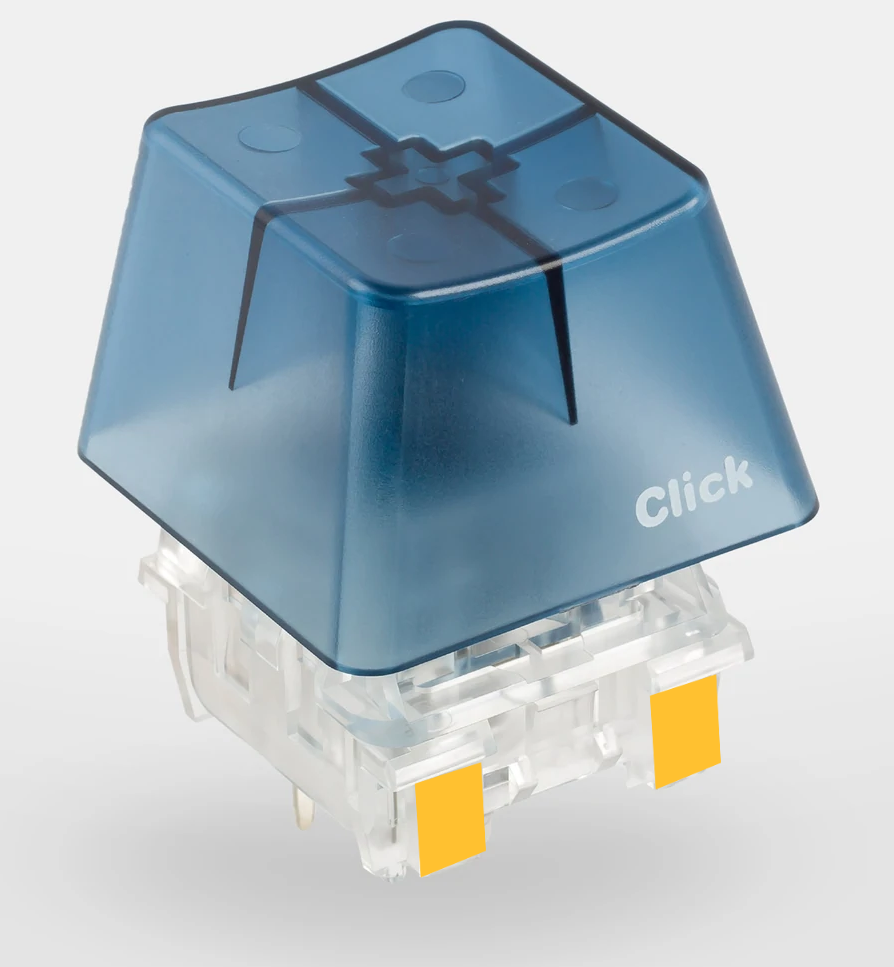
First off, is the switch for the keyboard. A while ago, I bought a blue NovelKeys Big Switch for myself as a novelty. I realized it would be pretty cool if I could make it into a usable keyboard, without spending obscene amounts of money on a pre-made kit. In hindsight, the blue “clicky” switch was a bit of a mistake. While I do normally like Cherry MX Blue switches, the click on this monsterous switch gets into “obnoxious” territory. If doing this over, I would get either the yellow or red switch.
The Case
The switch by itself barely stands up right, so I initially 3D printed a case just to hold it on my desk. I didn’t really feel like busting out Solidworks and designing something from scratch when I knew there were already designs online, so I printed out this case from Thingiverse. While that case is designed for RGB lighting, I just printed it in solid black.
The Microcontroller
To use the switch as a keyboard, I needed a microcontroller. The case I used above was designed for a Teensy 2.0, so I bought one of those. While other Teensy’s are available such as the 4.0, the 2.0 is still the smallest and cheapest one available at around $16 USD.
The Firmware
Once again, I went to find something pre-made. Keyboard firmware is deceptively complicated, so I used QMK. For maximum laziness, they even have a web configurator where you can design, compile, and download your firmware. There already exists a config for a single-key Teensy 2.0 keyboard here: https://config.qmk.fm/#/handwired/onekey/teensy_2/LAYOUT_ortho_1x1.
Simply change the key to whatever you want to use, hit “Compile” in the top-right, then “Firmware” in the bottom right" once it’s done compiling.
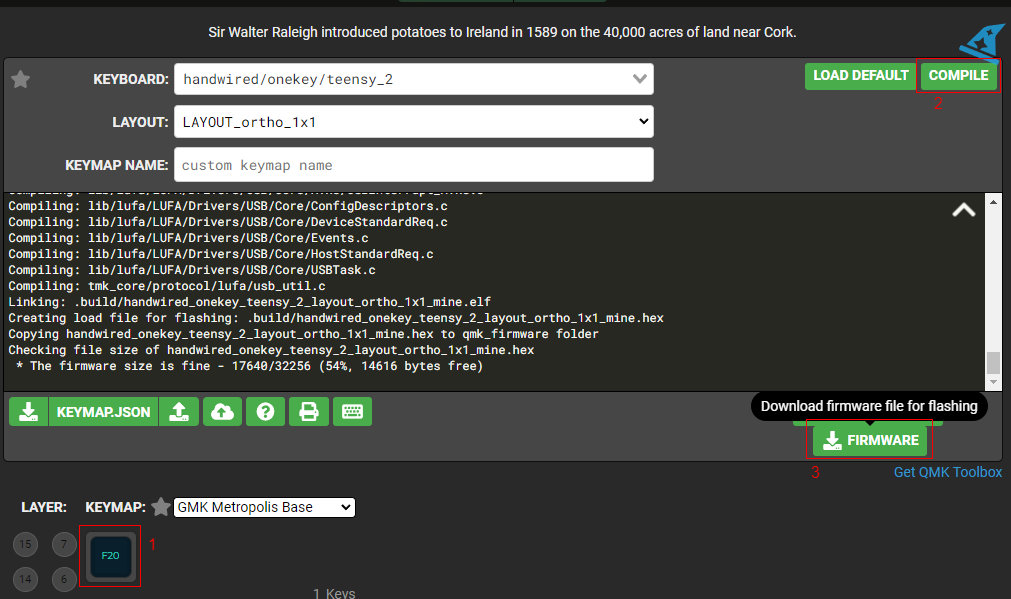
This will give you a .hex file, which you can then flash onto your Teensy 2.0.
Assembly
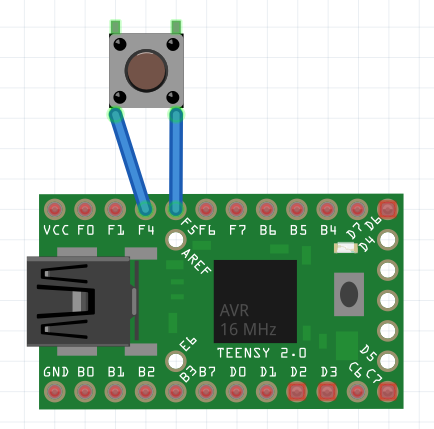
Wiring is stupid simple. As the layout description says, just wire together the F4 and F5 pins to the switch. You’re just shorting 2 pins together, so orientation does not matter.
To flash the firmware, download the Teensy Loader application from the website: https://www.pjrc.com/teensy/loader.html
Plug your Teensy into your computer, launch the application, select the .hex file you
downloaded, and select “Program”. If you haven’t used your Teensy before, it will still
be in Program Mode so you don’t even need to push the white button on it.
Now, because the case is slightly bigger than the switch itself (or at least how mine came out), I added 4 double-sided sticky pads on the front and back of the switch to hold it in place.
That’s about it, enjoy your new keyboard!
Going Further
Now, because your keyboard is all assembled, re-programming your Teensy can be a bit of a pain, which brings us to the distinction between firmware and software. In order to be able to readily change what my switch does, I decided to make the firmware register the key as the rarely used F20 key, then use a program to intercept that keypress, and do something else instead. This is super simple to do in AutoHotkey:
1F20::
2; renders to (╯°□°)╯︵ ┻━┻
3Send {U+0FF08}{U+0256F}{U+0B0}{U+025A1}{U+0B0}{U+0FF09}{U+0256F}{U+0FE35}{U+020}{U+0253B}{U+02501}{U+0253B}
4return
Other programs like PowerToys can do similar things as well. This allows me to easily swap out what the switch does without needing to re-flash the firmware.