IBM Model M Cleaning

Table of Contents
Background
As a graduation gift, a friend gave me an IBM Model M keyboard that he snagged from the university surplus store (not the first time that the surplus store has made an appearance with vintage tech).
This keyboard is absolutely delightful, and I wanted to make a post outlining my process of cleaning the board.
IBM Model M History
First, a history lesson.
The year is 1981. IBM has just released the first IBM Personal Computer. With each IBM PC came a buckling spring IBM Model F keyboard. Now, the standard keyboard layout we know today has not been developed yet. These Model F keyboards, while well-built and pleasant to type on, had a strange layout (by today’s standards).
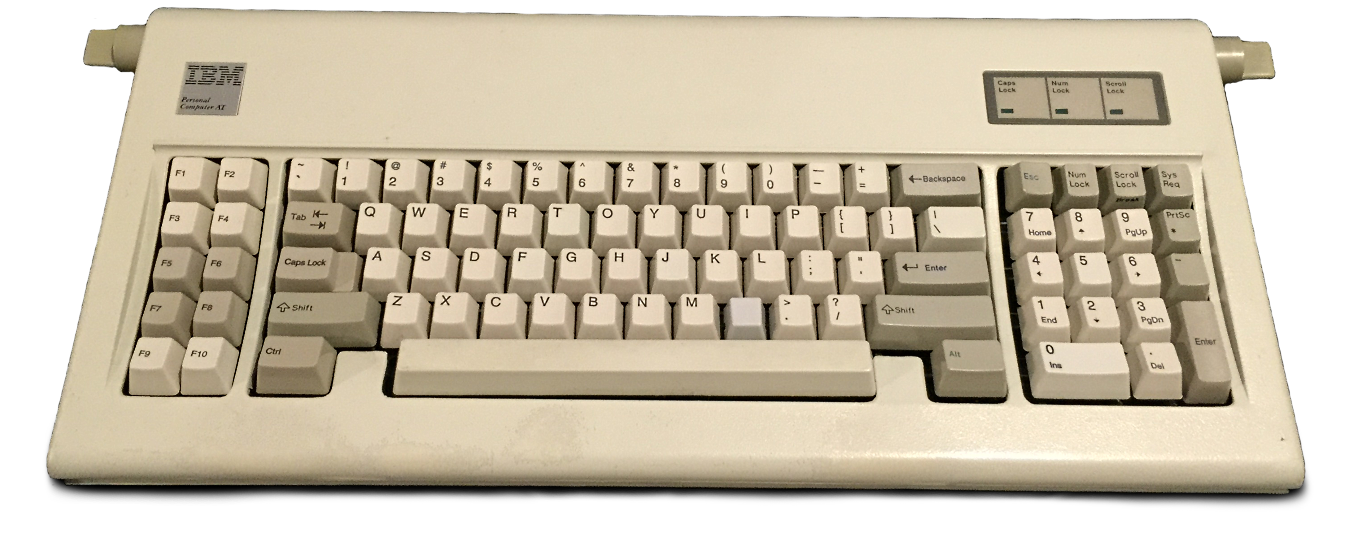
The function keys were in columns on the left side and the numpad had a weird layout with no addition or division keys. While the IBM PC was revolutionary for its time, IBM realized it could develop a more ergonomic keyboard, and sought out to improve their Model F. Hence, in 1984, the IBM Model M was born.
The IBM Model M (also known as the “IBM Enhanced Keyboard”) is the grandfather of all modern keyboards.
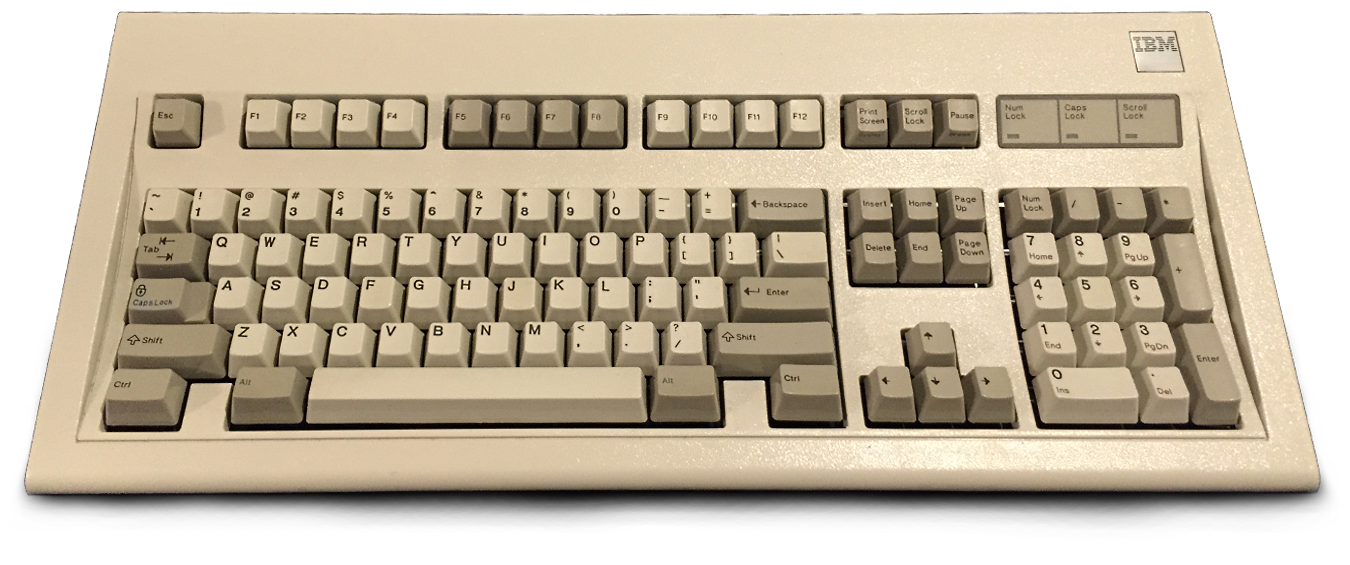
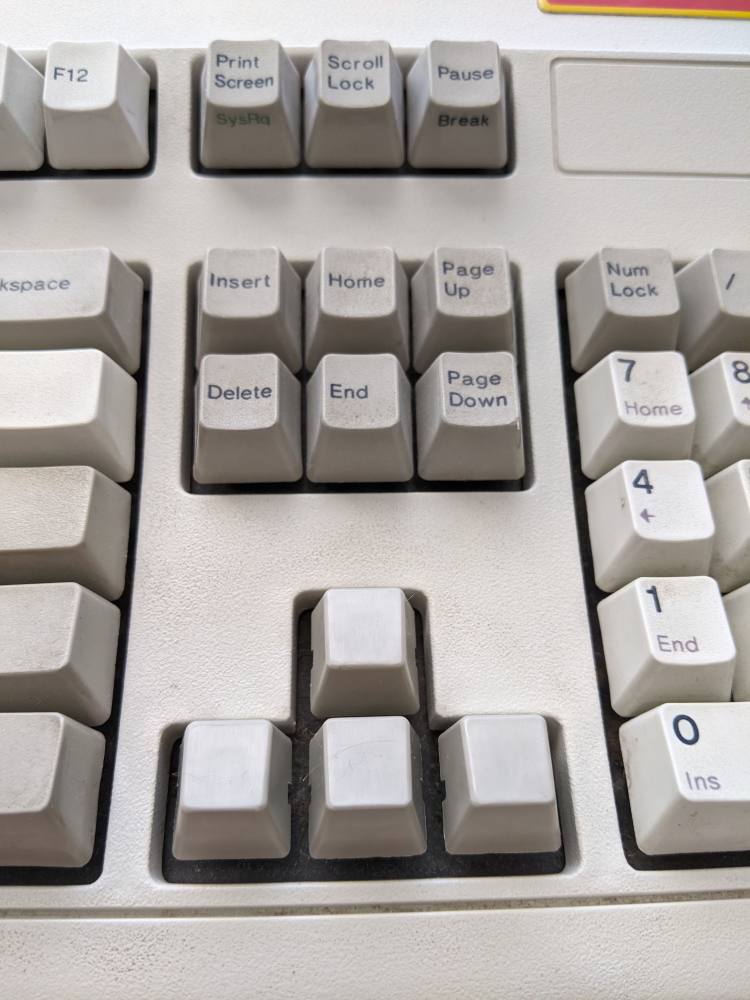
With what IBM learned from their ergonomics studies in the years prior, they moved the function keys to be above the number keys, in groups of four. They also rearranged the numpad, added the arrow keys, and added the six key block of Insert, Home, Delete, End, Page Up, and Page Down keys. However, they refused to add the increasingly common ⊞ Win key to their keyboard, opting to leave a blank space on either side of the Alt keys instead.
Now, in order to reduce costs from the Model F, IBM made some compromises with the Model M. Primarily, these were to change the Model F’s design with a capacitive membrane and full N-key rollover, to a membrane design and losing the N-key rollover support.
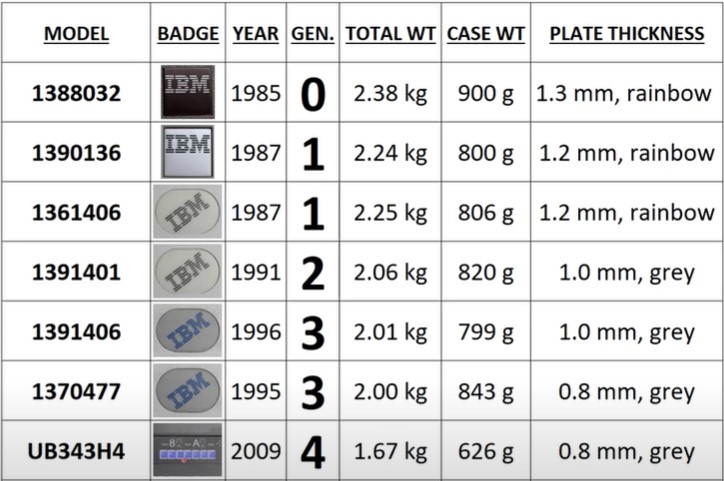
The history of the Model M is long and complicated as well over 100 different variants were produced (different colors, keyboard layouts, design improvements, connectors, logo style, etc.). The short version is that in 1991, IBM decided it didn’t want to continue manufacturing keyboards, and sold its keyboard business to Lexmark. Lexmark continuing making Model Ms until 1996 when they stopped production. After this, a group of ex-Lexmark employees bought the rights and manufacturing tooling, and formed the company Unicomp, who continues to manufacture brand-new Model M’s to this day in different colors, with Windows keys, and USB support (just without the IBM branding).

Over the years, to decrease manufacturing costs, the Model M’s were made cheaper by using lower quality plastics, and thinner components. This means that generally, the older a Model M is, the better built it is. This unfortunately means that Unicomp keyboards, while as close to real thing as you can get new, are based off the molds and manufacturing at the end of production, resulting in the lowest-quality of the Model M series.
My Specific Keyboard
With all that out of the way, let’s look at the exact keyboard I have.
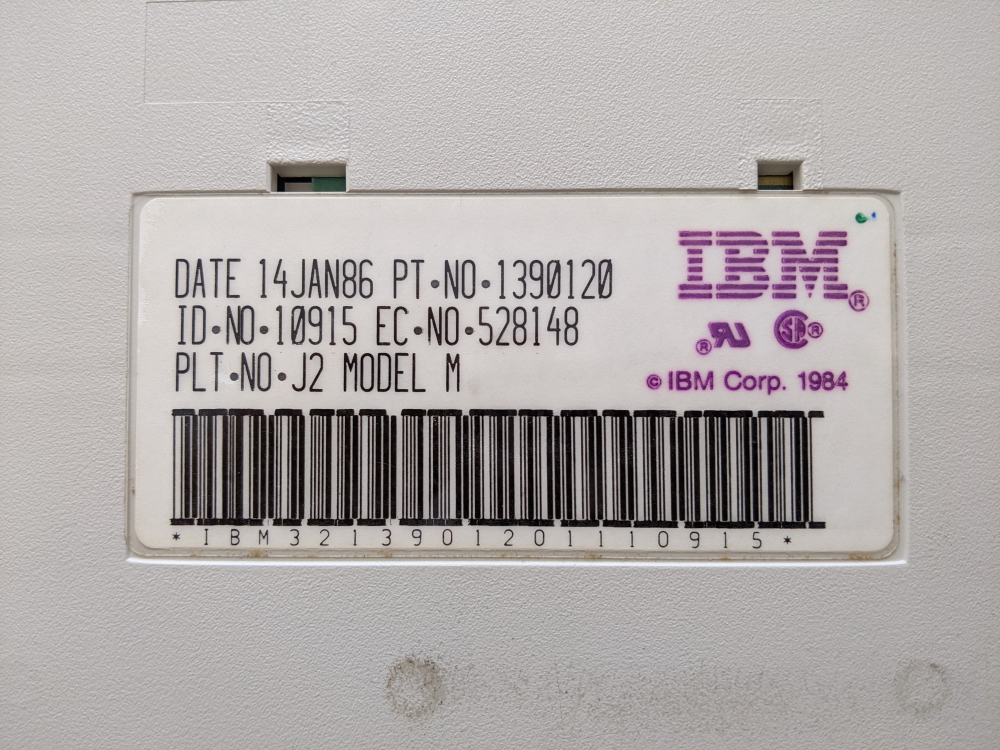
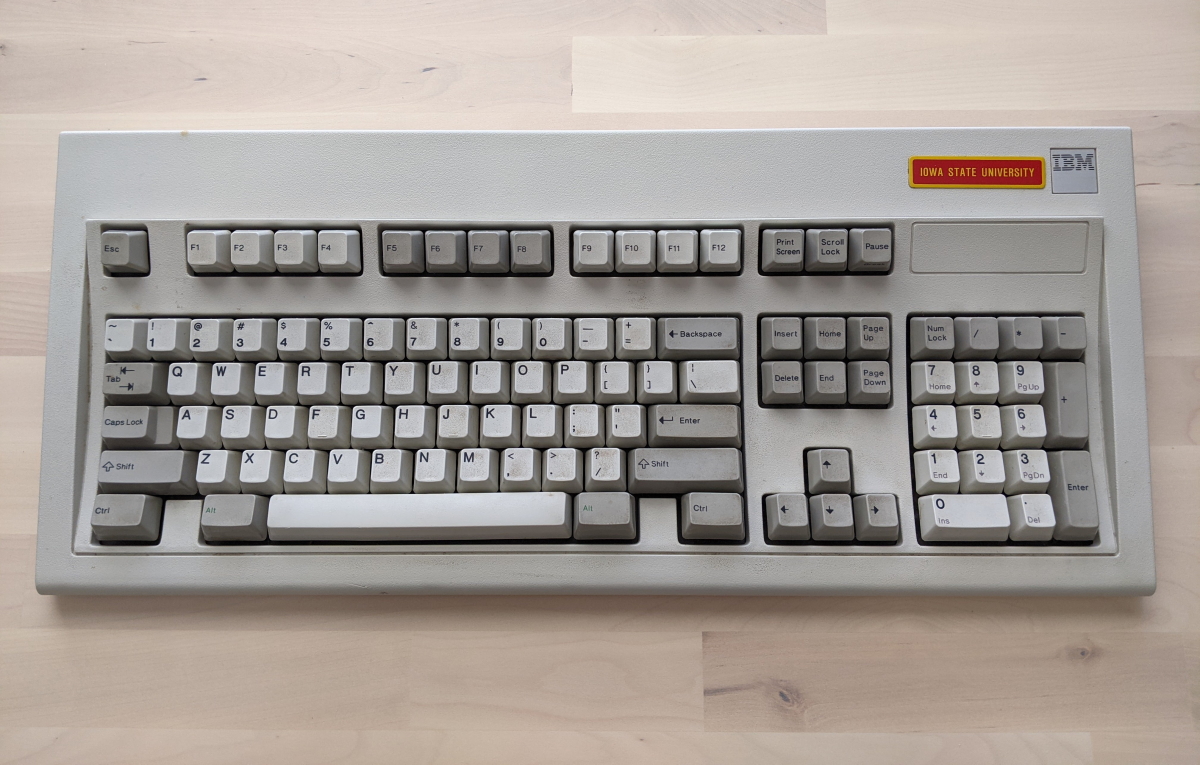
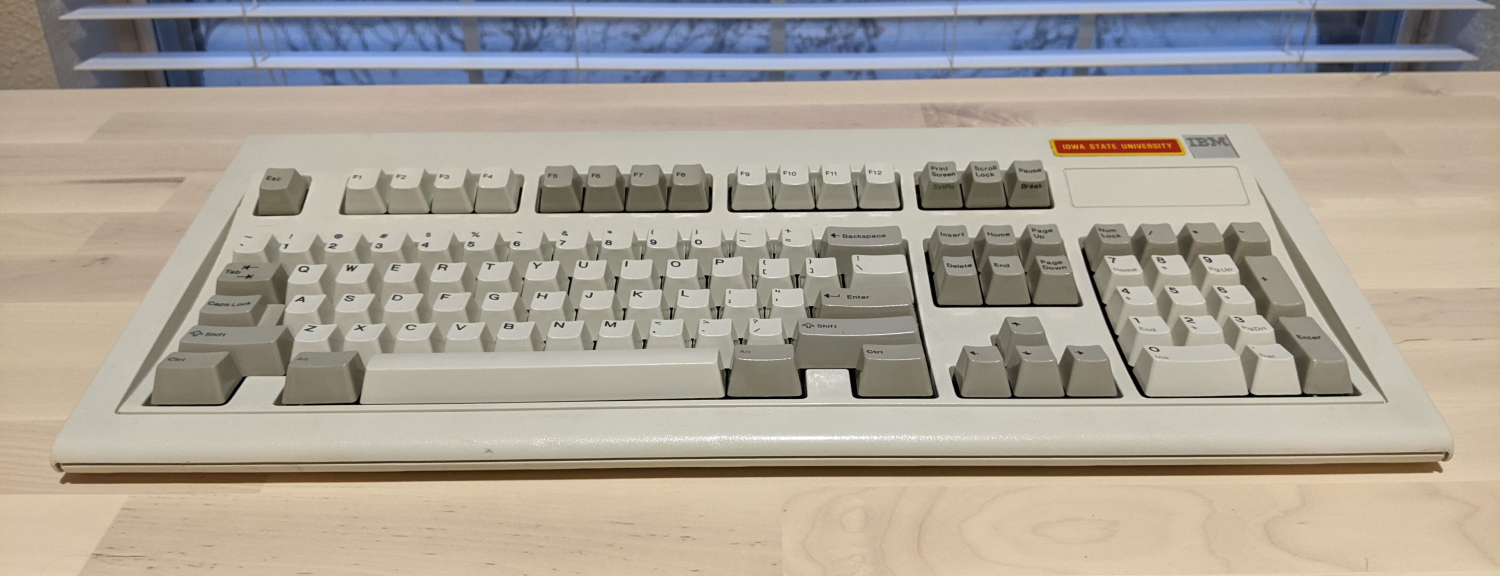
My Model M is a part number 1390120 and was built on January 14, 1986. There’s a few notable features about this part number compared to most.
Two of the most notable things are that
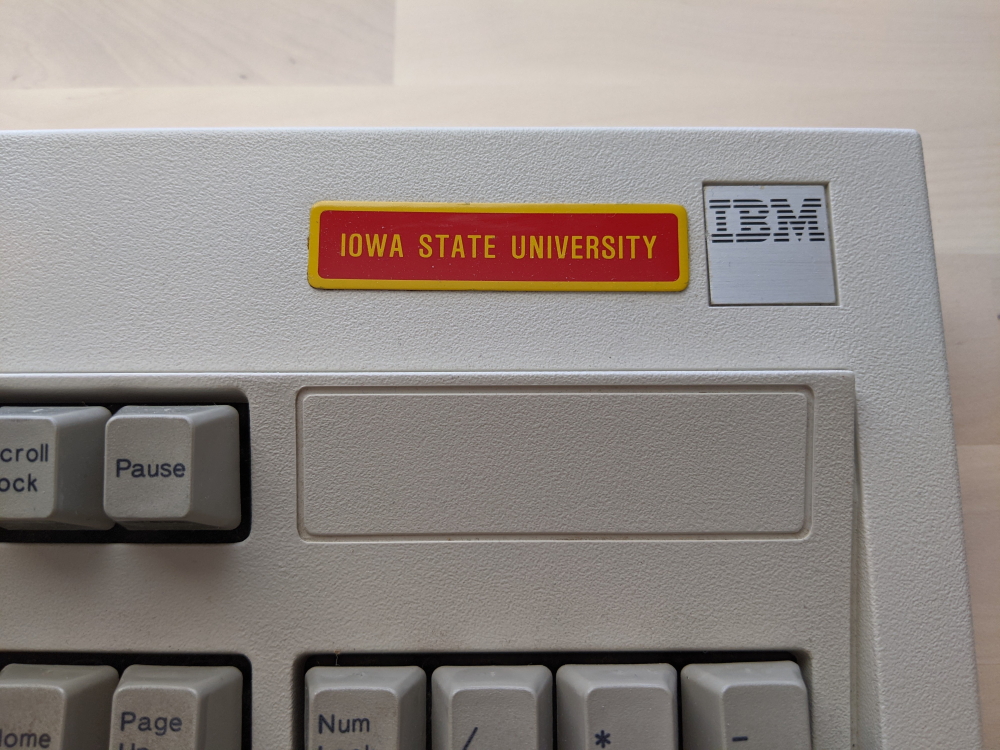
- There are no lock lights
- It has a square IBM badge
This tells us that the keyboard was one of the original generations produced, as the square IBM badges were only made for a few years before being replaced by oval badges. Additionally, the keyboard has no lock lights. This means that it must have been bundled with a PC or terminal that displayed the lock light status on the monitor rather than keyboard.
There are two more things that stand out to me. First, is the connector.
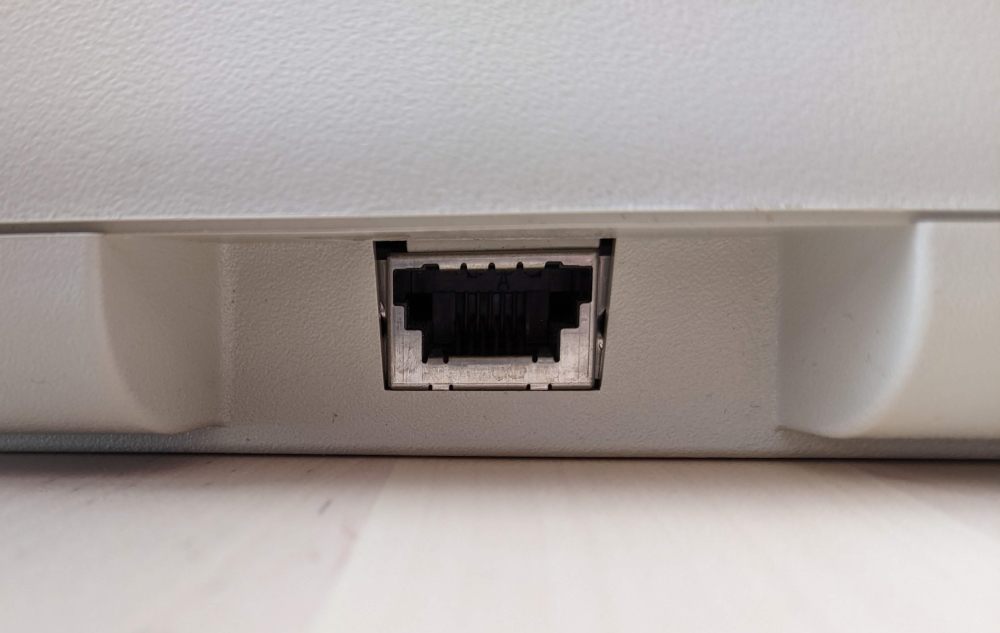
This keyboard has a removable SDL connector. As this keyboard actually predates the PS/2 protocol by a year, this keyboard likely came with a SDL to AT (basically a 5-pin DIN connector) cable from the factory.
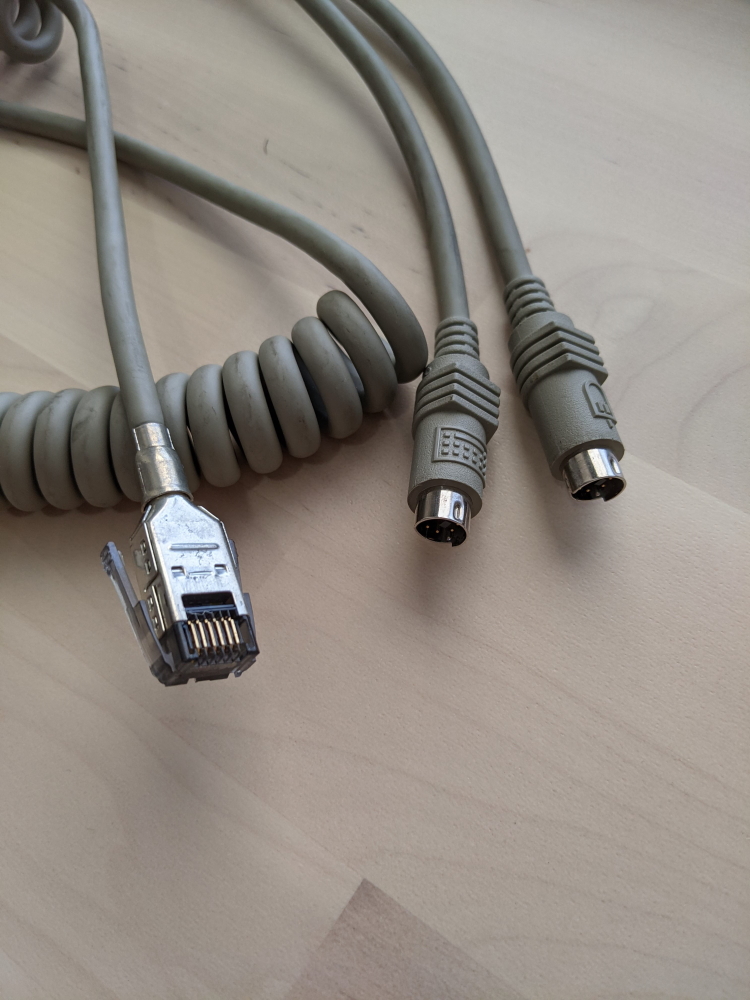
However, the keyboard was still compatible with the PS/2 protocol once it had been developed. While the original cable for the keyboard is long-gone, with the keyboard itself, I was given a SDL to PS/2 cable that works perfectly fine on modern motherboards.
Lastly, this keyboard also features relegendable keycaps. The keycap on each key is actually two pieces. The top piece comes off fairly easily with just your fingers, while the bottom piece is more firmly attached to the spring of each switch. This was done to make different localizations of the keyboards easier, as the keyboards and bottom keycaps could be mass produced, and only a secondary top keycap set produced for each localization.
Cleaning
Let’s get down to business. This keyboard had almost 35 years of grime on it. It wasn’t bad considering its age, but it wasn’t good either.

To clean my Model M I used the following tools:
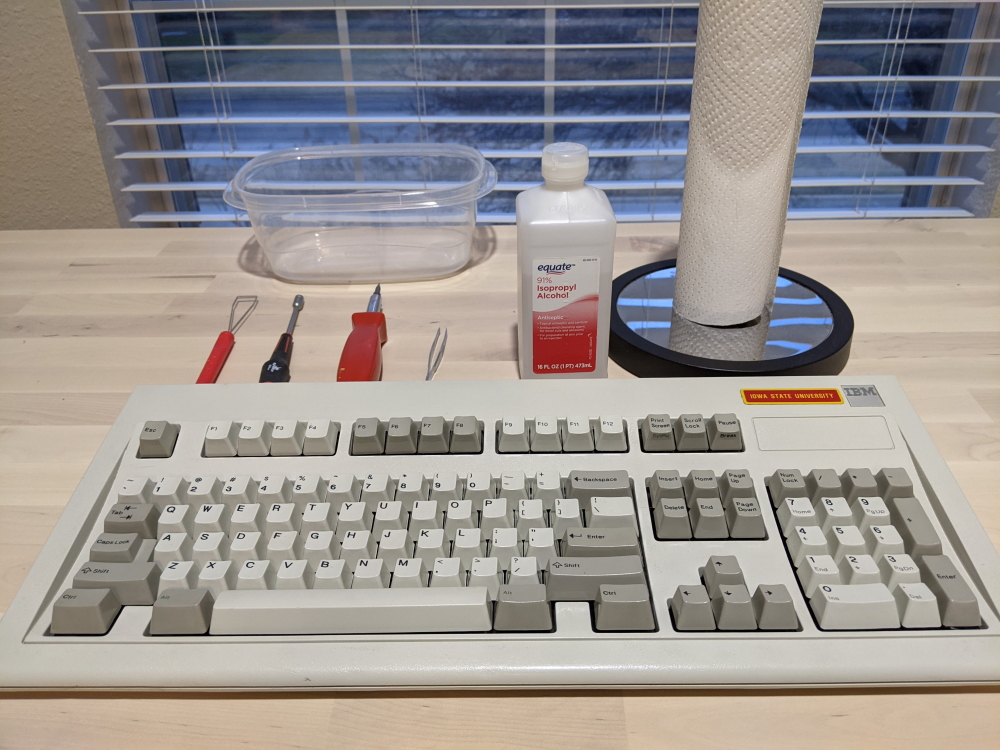
- Keycap puller
- 5.5mm nut driver
- Flat-head screwdriver
- Tweezers
- Isopropyl alcohol
- Lots of paper towels
- Small bin
The nut driver was a real pain. The 4 bolts required to disassemble the Model M are 7/32". My universal socket set was too wide to fit into the recesses to actually reach the head of each bolt. Finding an individual 7/32" nut driver online was expensive so I ended up ordering the linked 5.5mm nut driver for cheap instead. The sizes are nearly identical and it works fine.
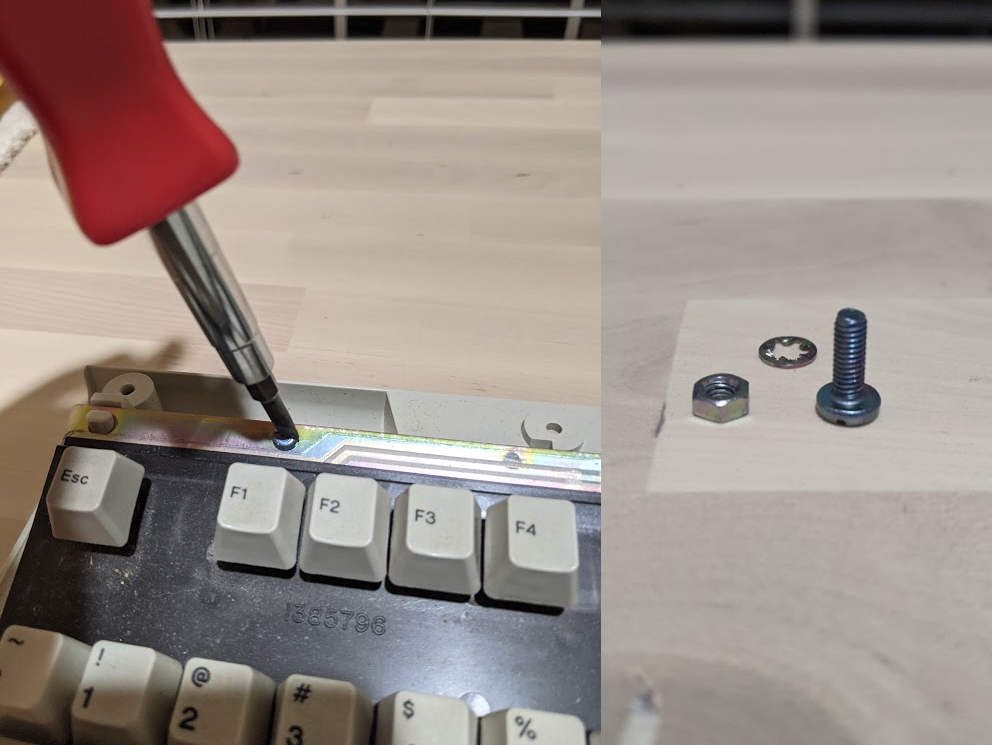
First, flip the keyboard upside down and remove these 4 bolts with your nut driver.
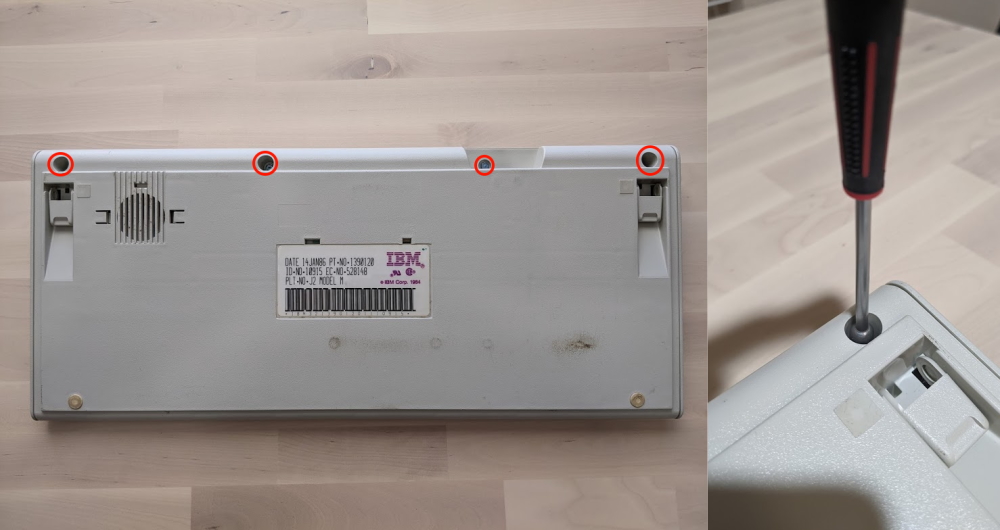
After you’ve done that, flip the keyboard right side up, and remove the top shell. It should unsnap pretty easily.
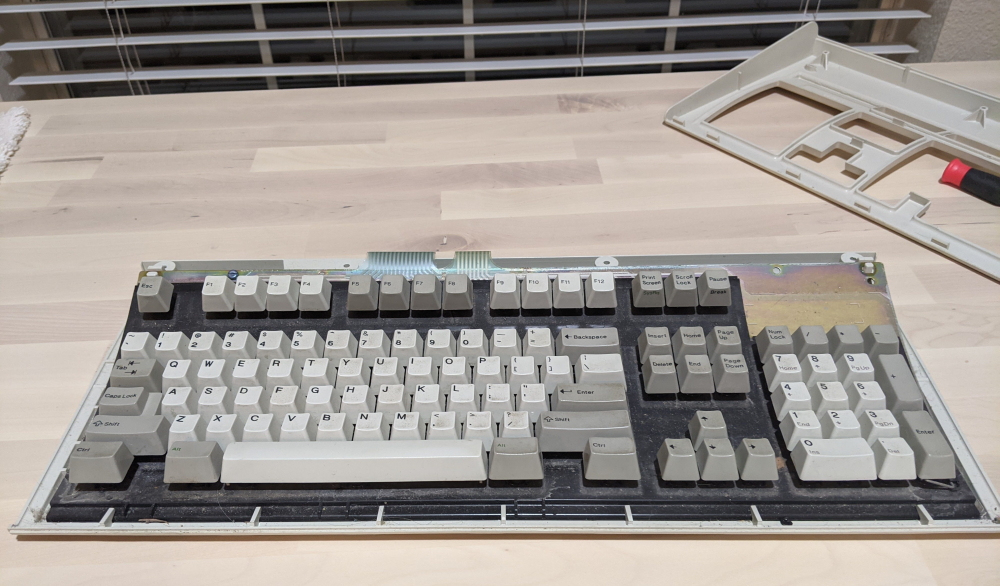
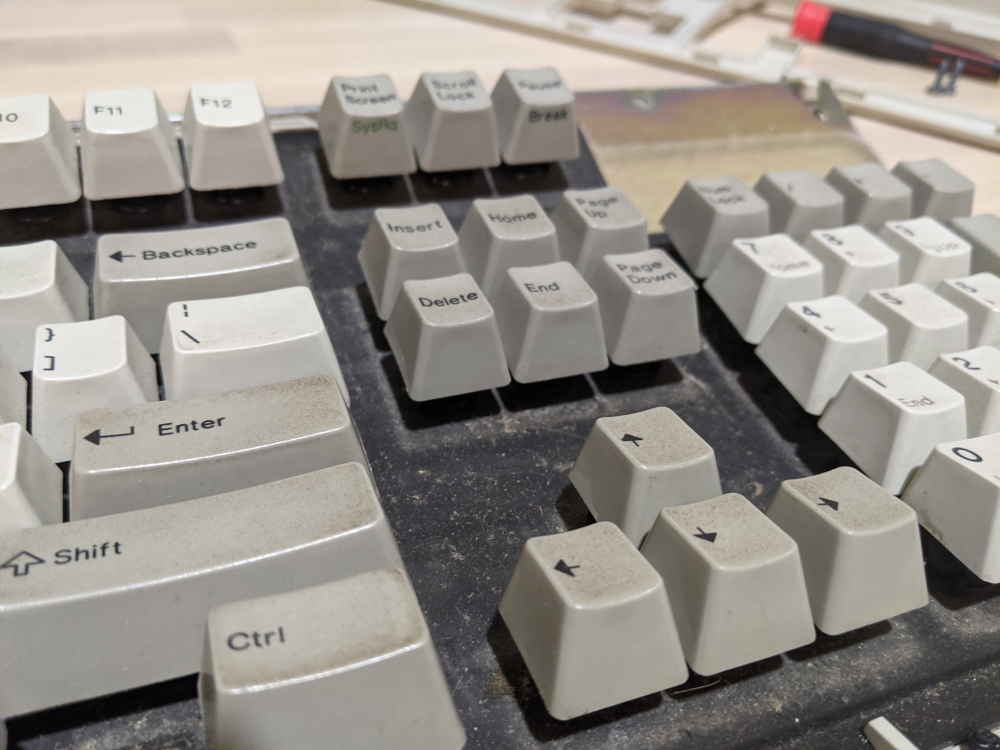
With the top shell taken off, I could see how dirty the keyboard really was.
Before the backplate can be removed, you first need to undo a small grounding strap located in the top left of the keyboard. This is held on by a flat-head bolt with a washer and a nut.
Before you can take out the backplate, there are two ribbon cables connecting the keyboard’s controller. I found the ribbon cables in my keyboard were pretty well attached, so I disconnected them outside of the case. Either way, you can lift out the backplate. Tilt it forwards to the front and lift gently (especially if the controller is still connected). It might need a little wiggle to free it.
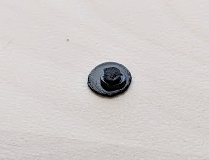
Now is a good time to inspect the rivets on the backside of the backplate. While the Model Ms were a great keyboard, they had one major design flaw. To save cost, IBM used plastic rivets to connect the steel backplate to the membrane and plastic housing for the switches. Over time, these rivets tend to break from becoming brittle with age, and everyday typing forces.
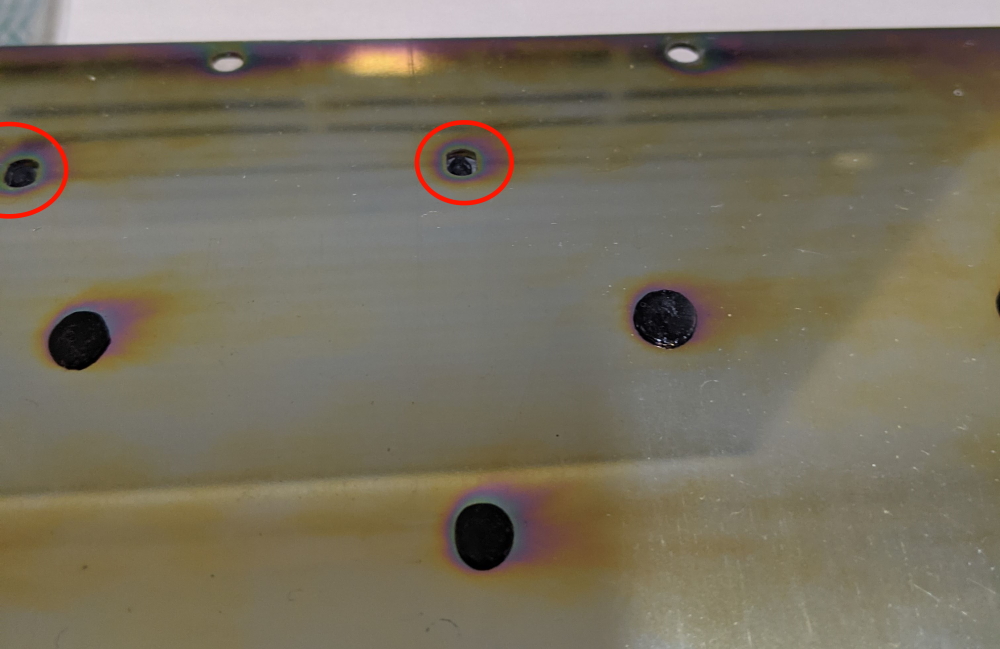
If too many of these rivets are sheared off, you will likely need to bolt mod your keyboard to permanently replace the plastic rivets. In my case, only 4 were broken so I left it.
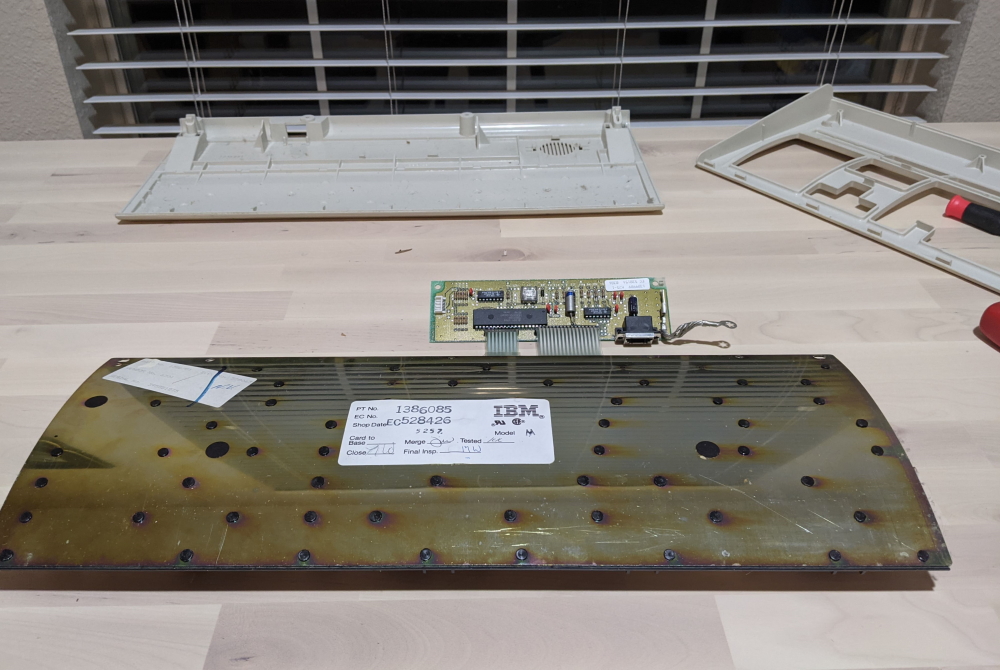
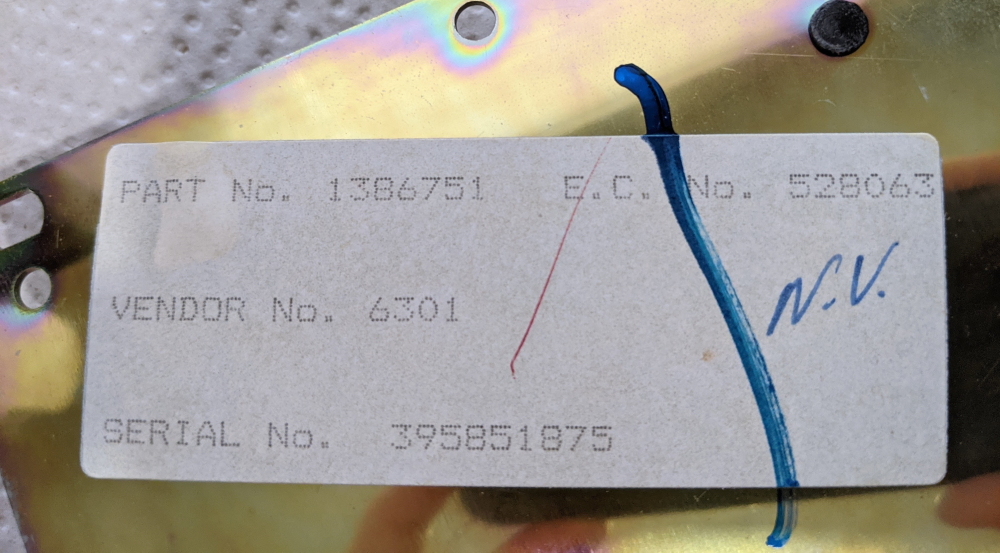
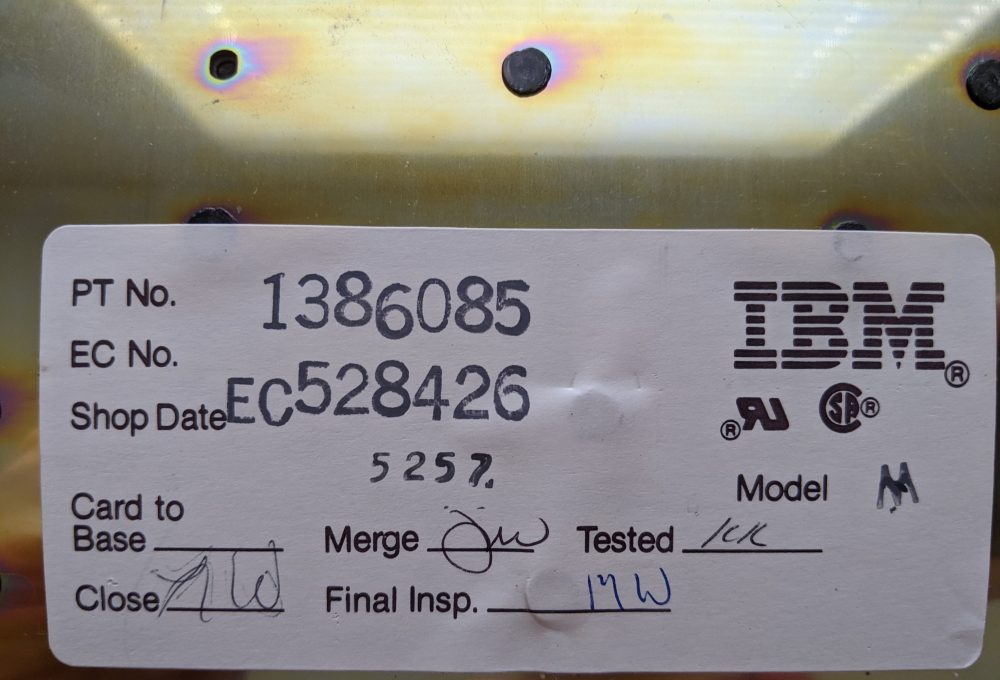
Also on the backside of the backplate are two inspection stickers from the factory. Notice the absolutely gorgeous shiny rainbow finish of the backplate.
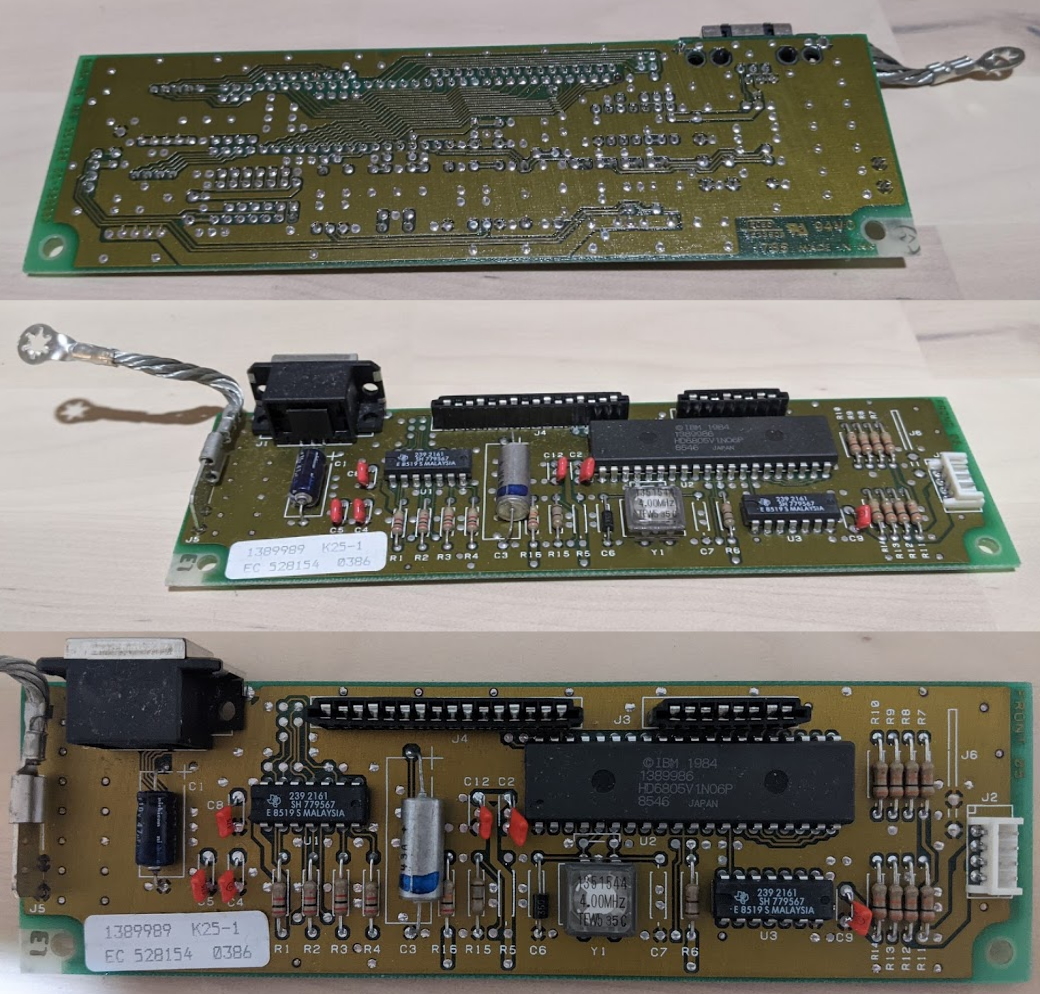
The controller PCB was very clean so I left it alone.
Shell
Now, time to clean the keyboard. For the two shell halves, I used isopropyl alcohol along with soap to clean as much grime as I could off the surface of the plastic. For some of the tough to reach areas like the grooves on the top shell, I used a small flat-head screwdriver with the tip wrapped with some paper towels soaked in alcohol, and ran it back and forth. Worked pretty well, though I may have scraped a little bit of plastic off.
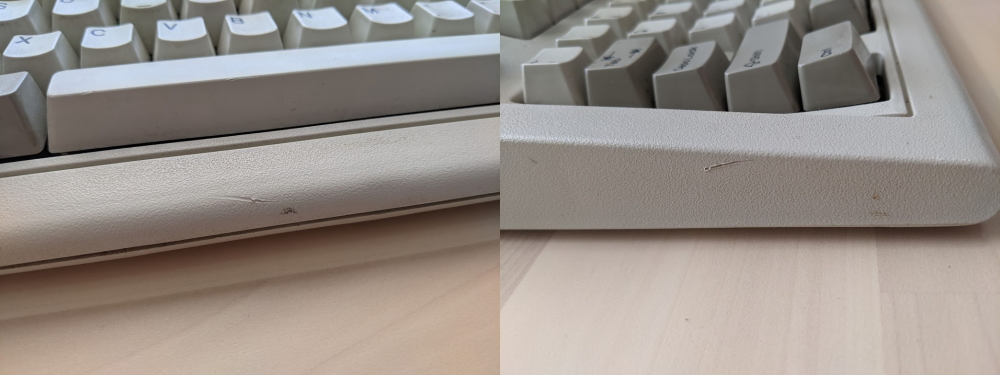
Now, there were some nicks on the upper shell. I decided to just leave them as-is. I was afraid trying to sand them down at all would do more harm than good.
As for the Iowa State University tramp stamp on the top, I also decided to leave that. After all, that’s how I got the keyboard, the badge itself is in fine shape, and it gives the keyboard a special uniqueness to it.
Keycaps
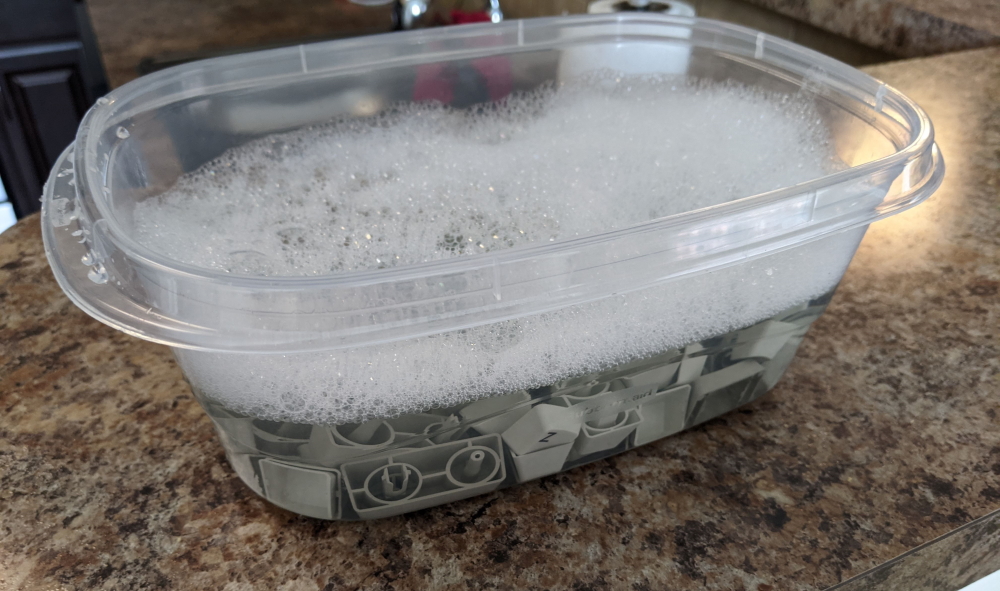
To clean the keycaps, I first removed all the top layer keycaps and put them in small tub.

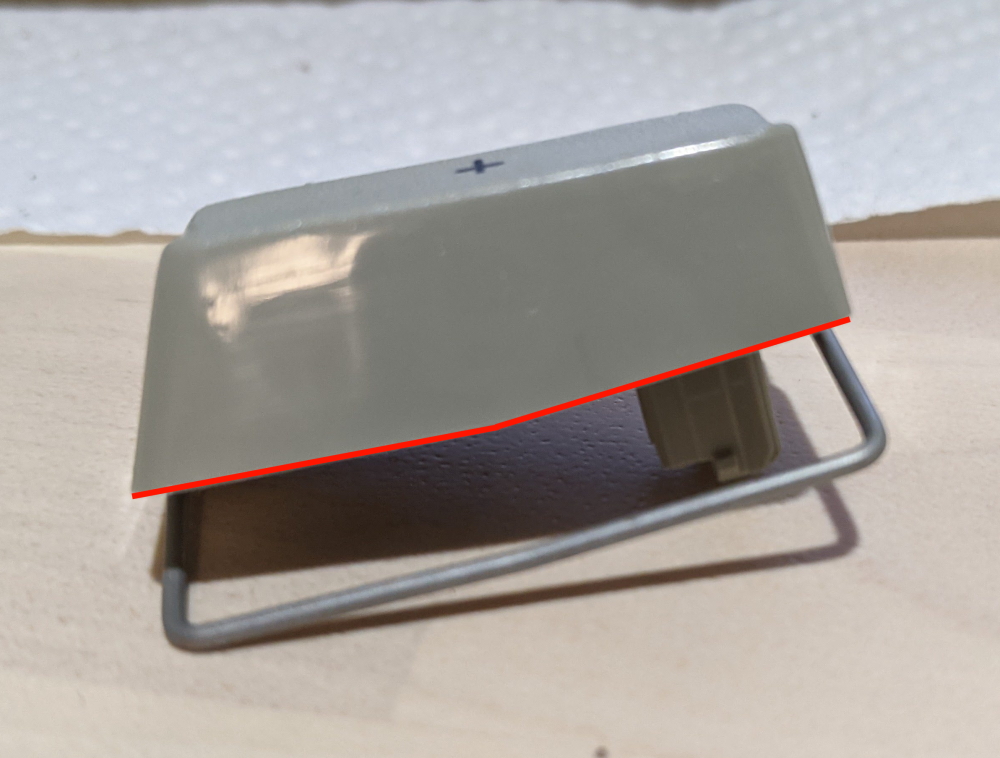
Be careful when removing the spacebar, and numpad + and Enter keys, as they have stabilizers. The stabilizers for the two numpad keys have a slight bend in them as well that follows the curve of the keycap, so remember this when putting the keycaps back on.
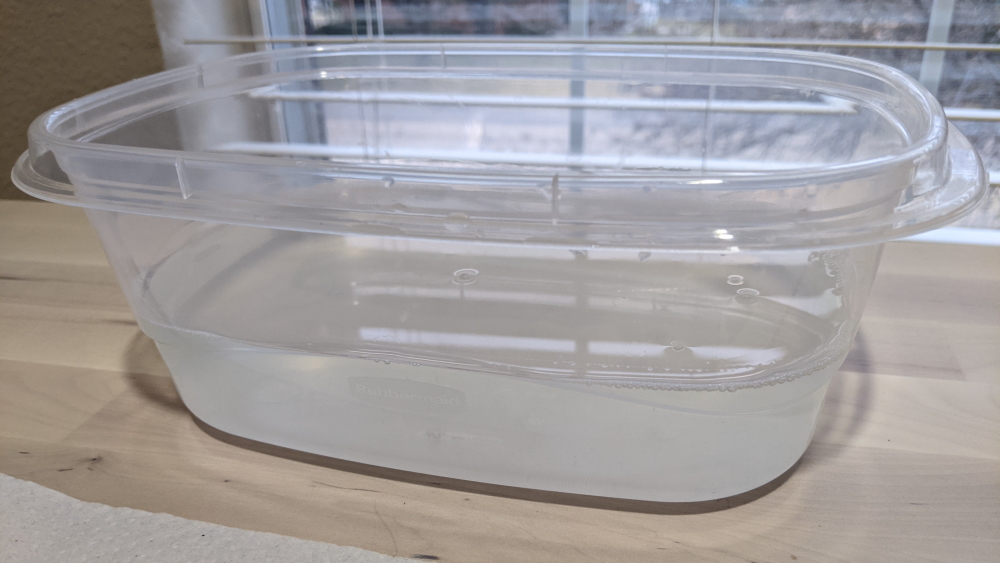
For all the keycaps in my tub, I filled it with warm soapy water and let them soak for an hour.
This doesn’t hurt the legends at all as they are dye-sublimated. The grime came right off with just a wipe of paper towel.
To reassemble, I found it easier to put the keycaps with stabilizers on the spring first, then feed the stabilizer into its slot rather than the other way around.
Baseplate
To clean the baseplate, I also took off all the bottom keycaps.

I initially tried to clean the baseplate without removing these, as I knew getting junk into the switch stems is very bad, but they’re just too much in the way. Just be careful to not drop anything down the switch stems.
Unlike most keyboards, you don’t need to keep track of which row which keycap came from. On a Model M, the profile of every keycap is identical. To achieve per-row sculpting, the switches themselves are put on a curve.
In terms of cleaning the backplate, I used a lot of paper towels soaked with alcohol. To get in some of the tighter spaces, I again used a screwdriver tip wrapped in paper towels to run through the spaces.
Result
Reassembly is straightforward, just do everything in reverse. Put the keycaps back on, put the controller back in, reattach the ribbon cables, put the backplate back in, reattach the grounding strap, flip it over, and put the bolts back in. I did find that a few keys were a little finnicky after cleaning. Taking off the keycaps on the affected keys and reseating them did the trick.
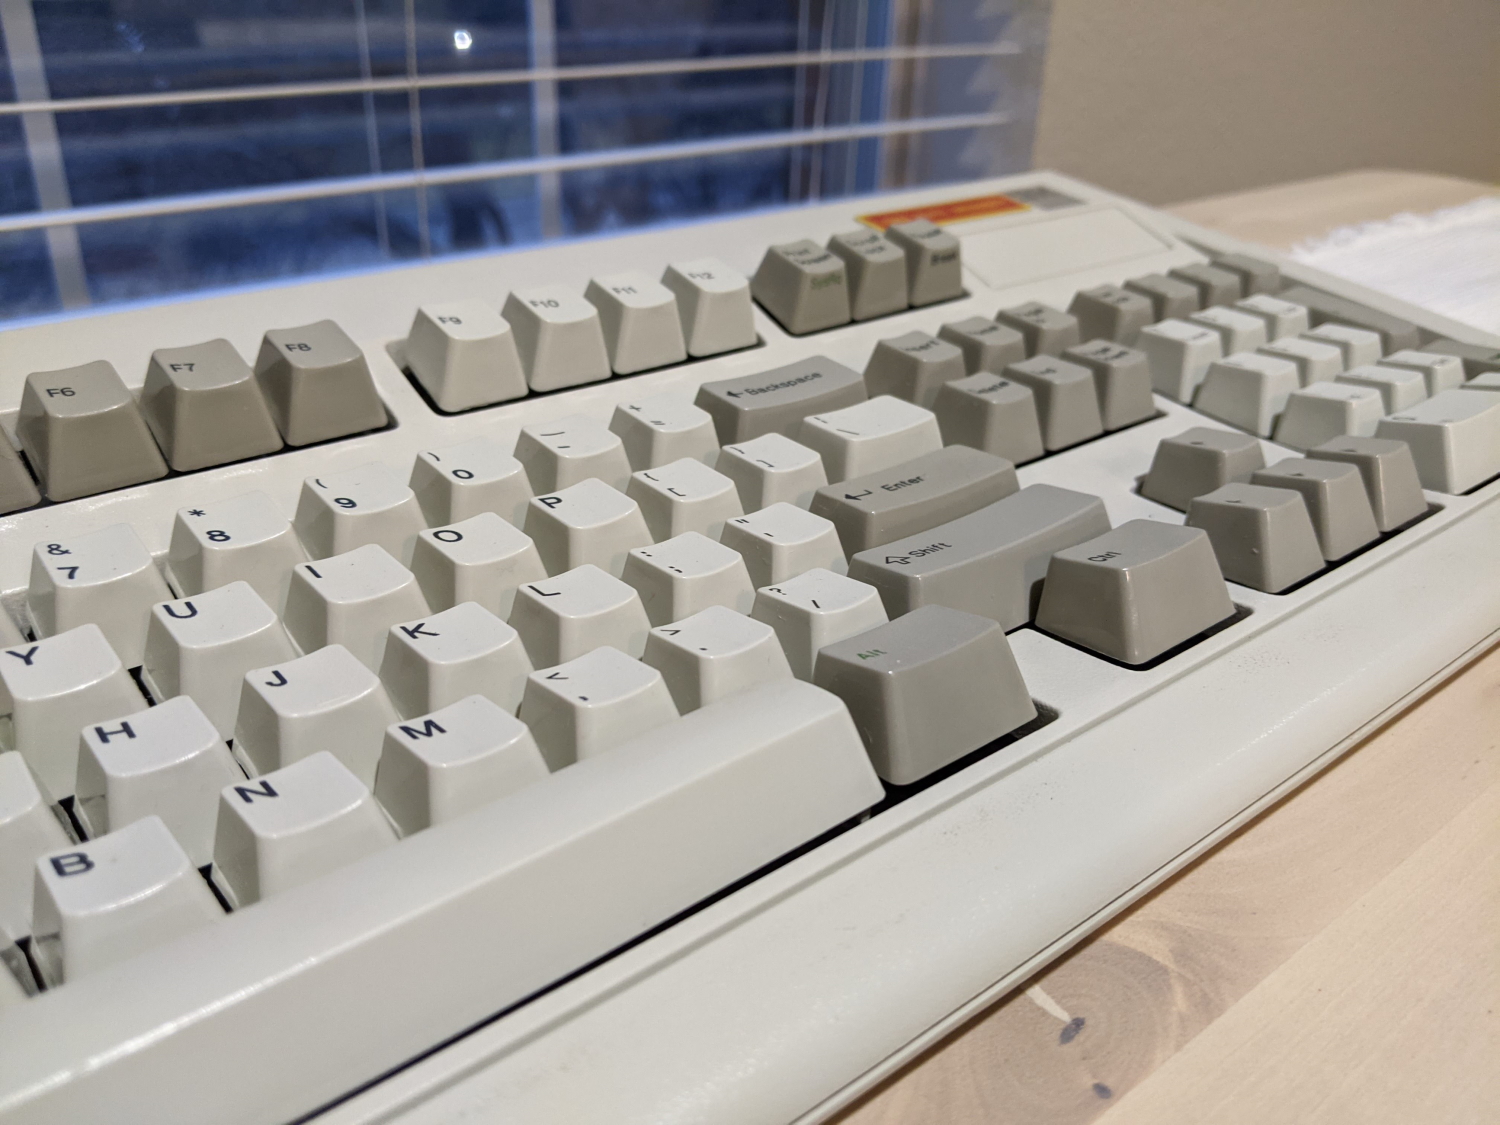
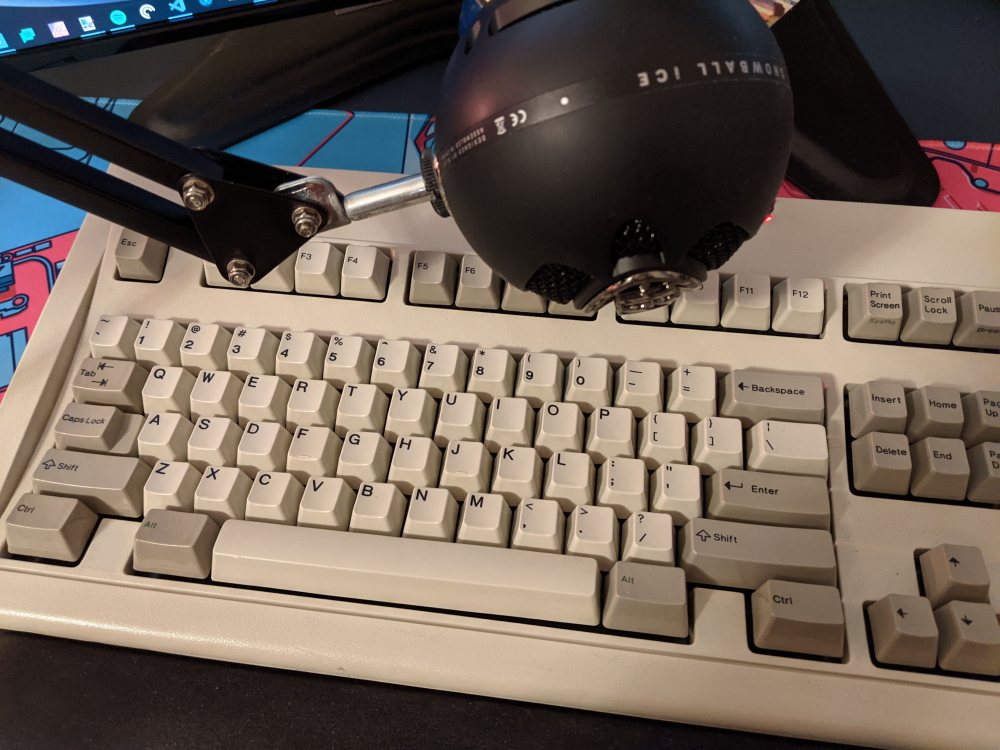
I’m extremely pleased with the result. While not perfect, it’s way better than I originally got it, and looks absolutely magnificent.
Review
Here’s my thoughts on the keyboard. Mind you, I’ve only typed on Cherry MX Blue and Brown switches prior. I don’t have the time or money to be a true keyboard aficionado like some on /r/MechanicalKeyboards.

Feel
Overall, I like the board a lot. The tactileness of the switches is lovely, though I usually bottom out keycaps anyways. The switches are far heavier than I was used to with Blues and at first left my fingers feeling tired after lots of typing. They do have a certain “sponginess” to them because of the spring.
Sound
The sound of the Model M is definitely lower-pitched than Cherry switches, but a lot more “pingy”, which makes sense as the keys are directly connected to a spring. I recorded samples of each for you to compare.
Each sample was done with no risers on the back deployed, and not modified in any way.
Issues
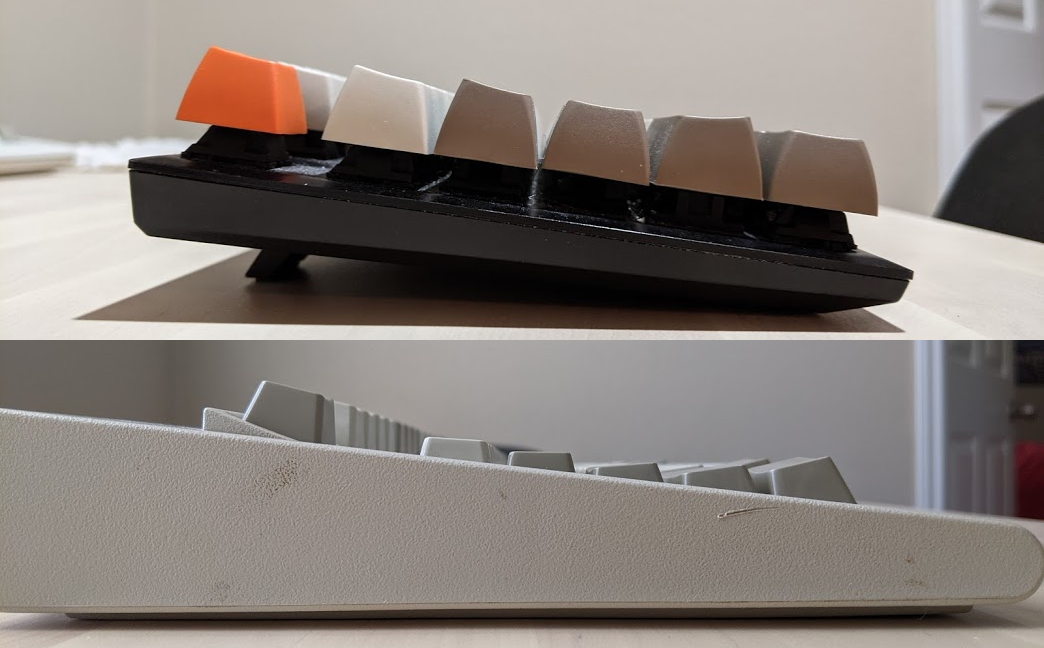
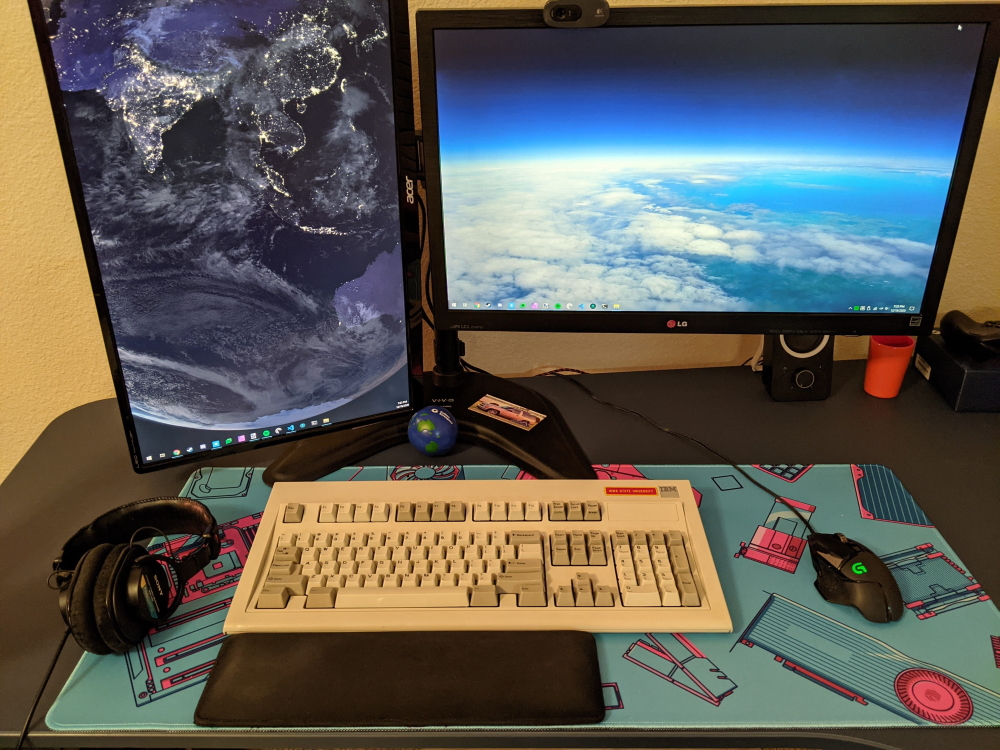
There’s a few things you have to deal with, with a keyboard this old. First is the size. This thing is a monster. It’s 19.25 inches long by 8.25 inches wide. It takes up a ton of desk space.
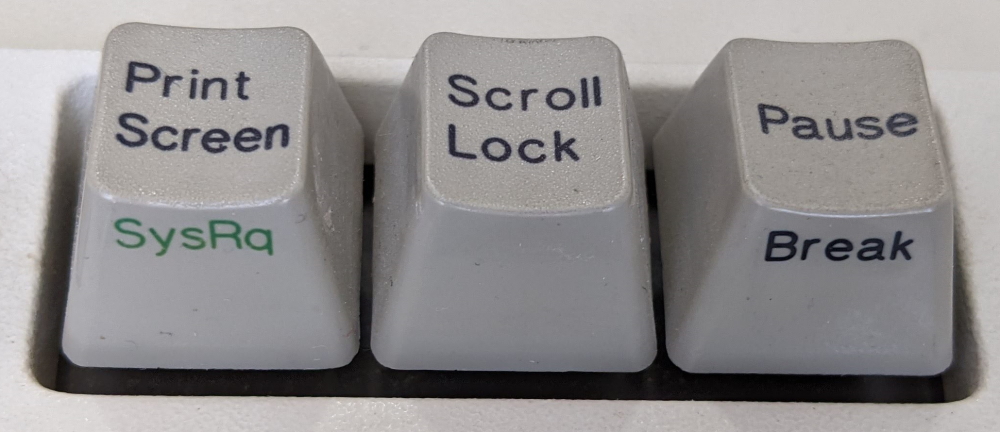
Additionally, the lack of Windows key can be problematic. I was able to get around this by using the program SharpKeys and remapping the Scroll Lock key to act as a Windows key as I can’t think of a time I’ve ever actually needed the key.
Another thing is the PS/2 connector. While my motherboard does have a port, many computers nowadays (especially laptops) do not, and PS/2 is also not hot-swappable like USB. I went ahead bit the bullet and bought this $35 SDL to USB cable that has an nice adapter built in to the cable itself. Unfortunately, it hasn’t shown up yet due to USPS delays, but it should make using the keyboard a bit easier and more universal while not modifying the guts.
Lastly, with my specific keyboard not having any lock lights, knowing whether Num Lock or Caps Lock is on can be frustrating. For this, I’ve found the program TrayStatus works wonderfully, by adding customizable icons in the Windows system tray.

Conclusion
I love this keyboard. It’s loud, fun to type on, and built like a tank. It’s survived over 30 years in a university environment, and ready for 30 more. While it may not be my daily driver, and too loud for office use, I fully plan on using it frequently and expect to be able to pass this down to my grandchildren. They sure don’t build ’em like they used to.
References
- https://www.youtube.com/watch?v=r5H58uudo1Y
- https://www.youtube.com/watch?v=D7wmMZmMinM
- https://en.wikipedia.org/wiki/Model_F_keyboard
- https://en.wikipedia.org/wiki/Model_M_keyboard
- https://en.wikipedia.org/wiki/Shielded_data_link_connector
- https://en.wikipedia.org/wiki/PS/2_port
- https://deskthority.net/wiki/AT_keyboard_interface
- https://deskthority.net/wiki/Keycap_printing#Dye_sublimation
- https://www.reddit.com/r/MechanicalKeyboards/comments/d43o11/this_subreddit_in_a_nutshell/
- https://github.com/randyrants/sharpkeys
- https://www.traystatus.com/