Polishing Antique Brass Door Hardware

Table of Contents
Background
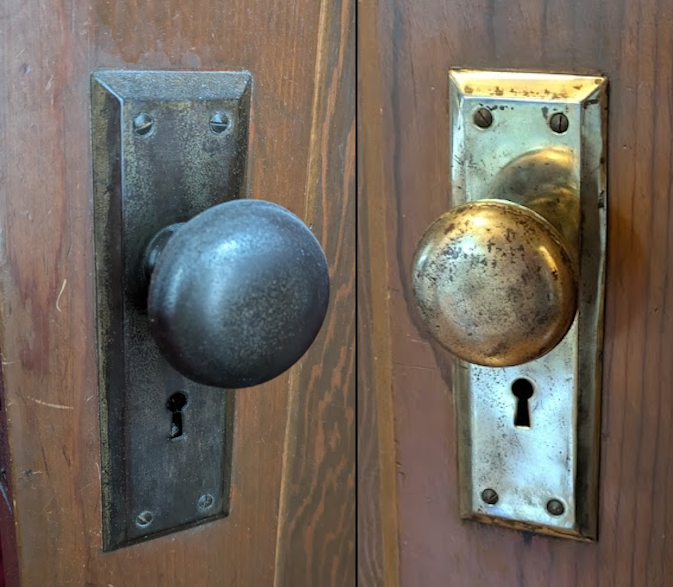
My house is currently 104 years old. I’m reasonably certain all of the doors and door hardware are original. I’ve refinished many of the doors, but the hardware is not looking that great. Here is how I managed to polish most of the brass door hardware to look better. This is not going to be some magic bullet. If the brass has been worn off, there is no way to get it back without re-plating it which is not a simple process. But I feel I had a method that spent 20% of the effort and got 80% of the results for my old Mortise sets.
Supplies
- Brasso (can order online or get at most hardware stores)
- Microfiber cloths
- A lot of vinegar (I used over a gallon)
- Sacrificial pot (grab one from a thrift store, you won’t want to reuse it for food again)
- Bench grinder (One I bought at Menards)
- Polishing wheels (Amazon link)
- Tongs
- Gloves
- Safety glasses
- Face mask
Process
First, remove the hardware from the door. You’ll need to remove the door knob first, there should be a screw on each side holding the knobs together. After removing that, you can remove the knob, and then slide out the other side. Next, remove the screws holding the faceplates on each side. These may be stuck on the door even after removing the screws, so thwack it with your screwdriver handle a few times to get it to come off.
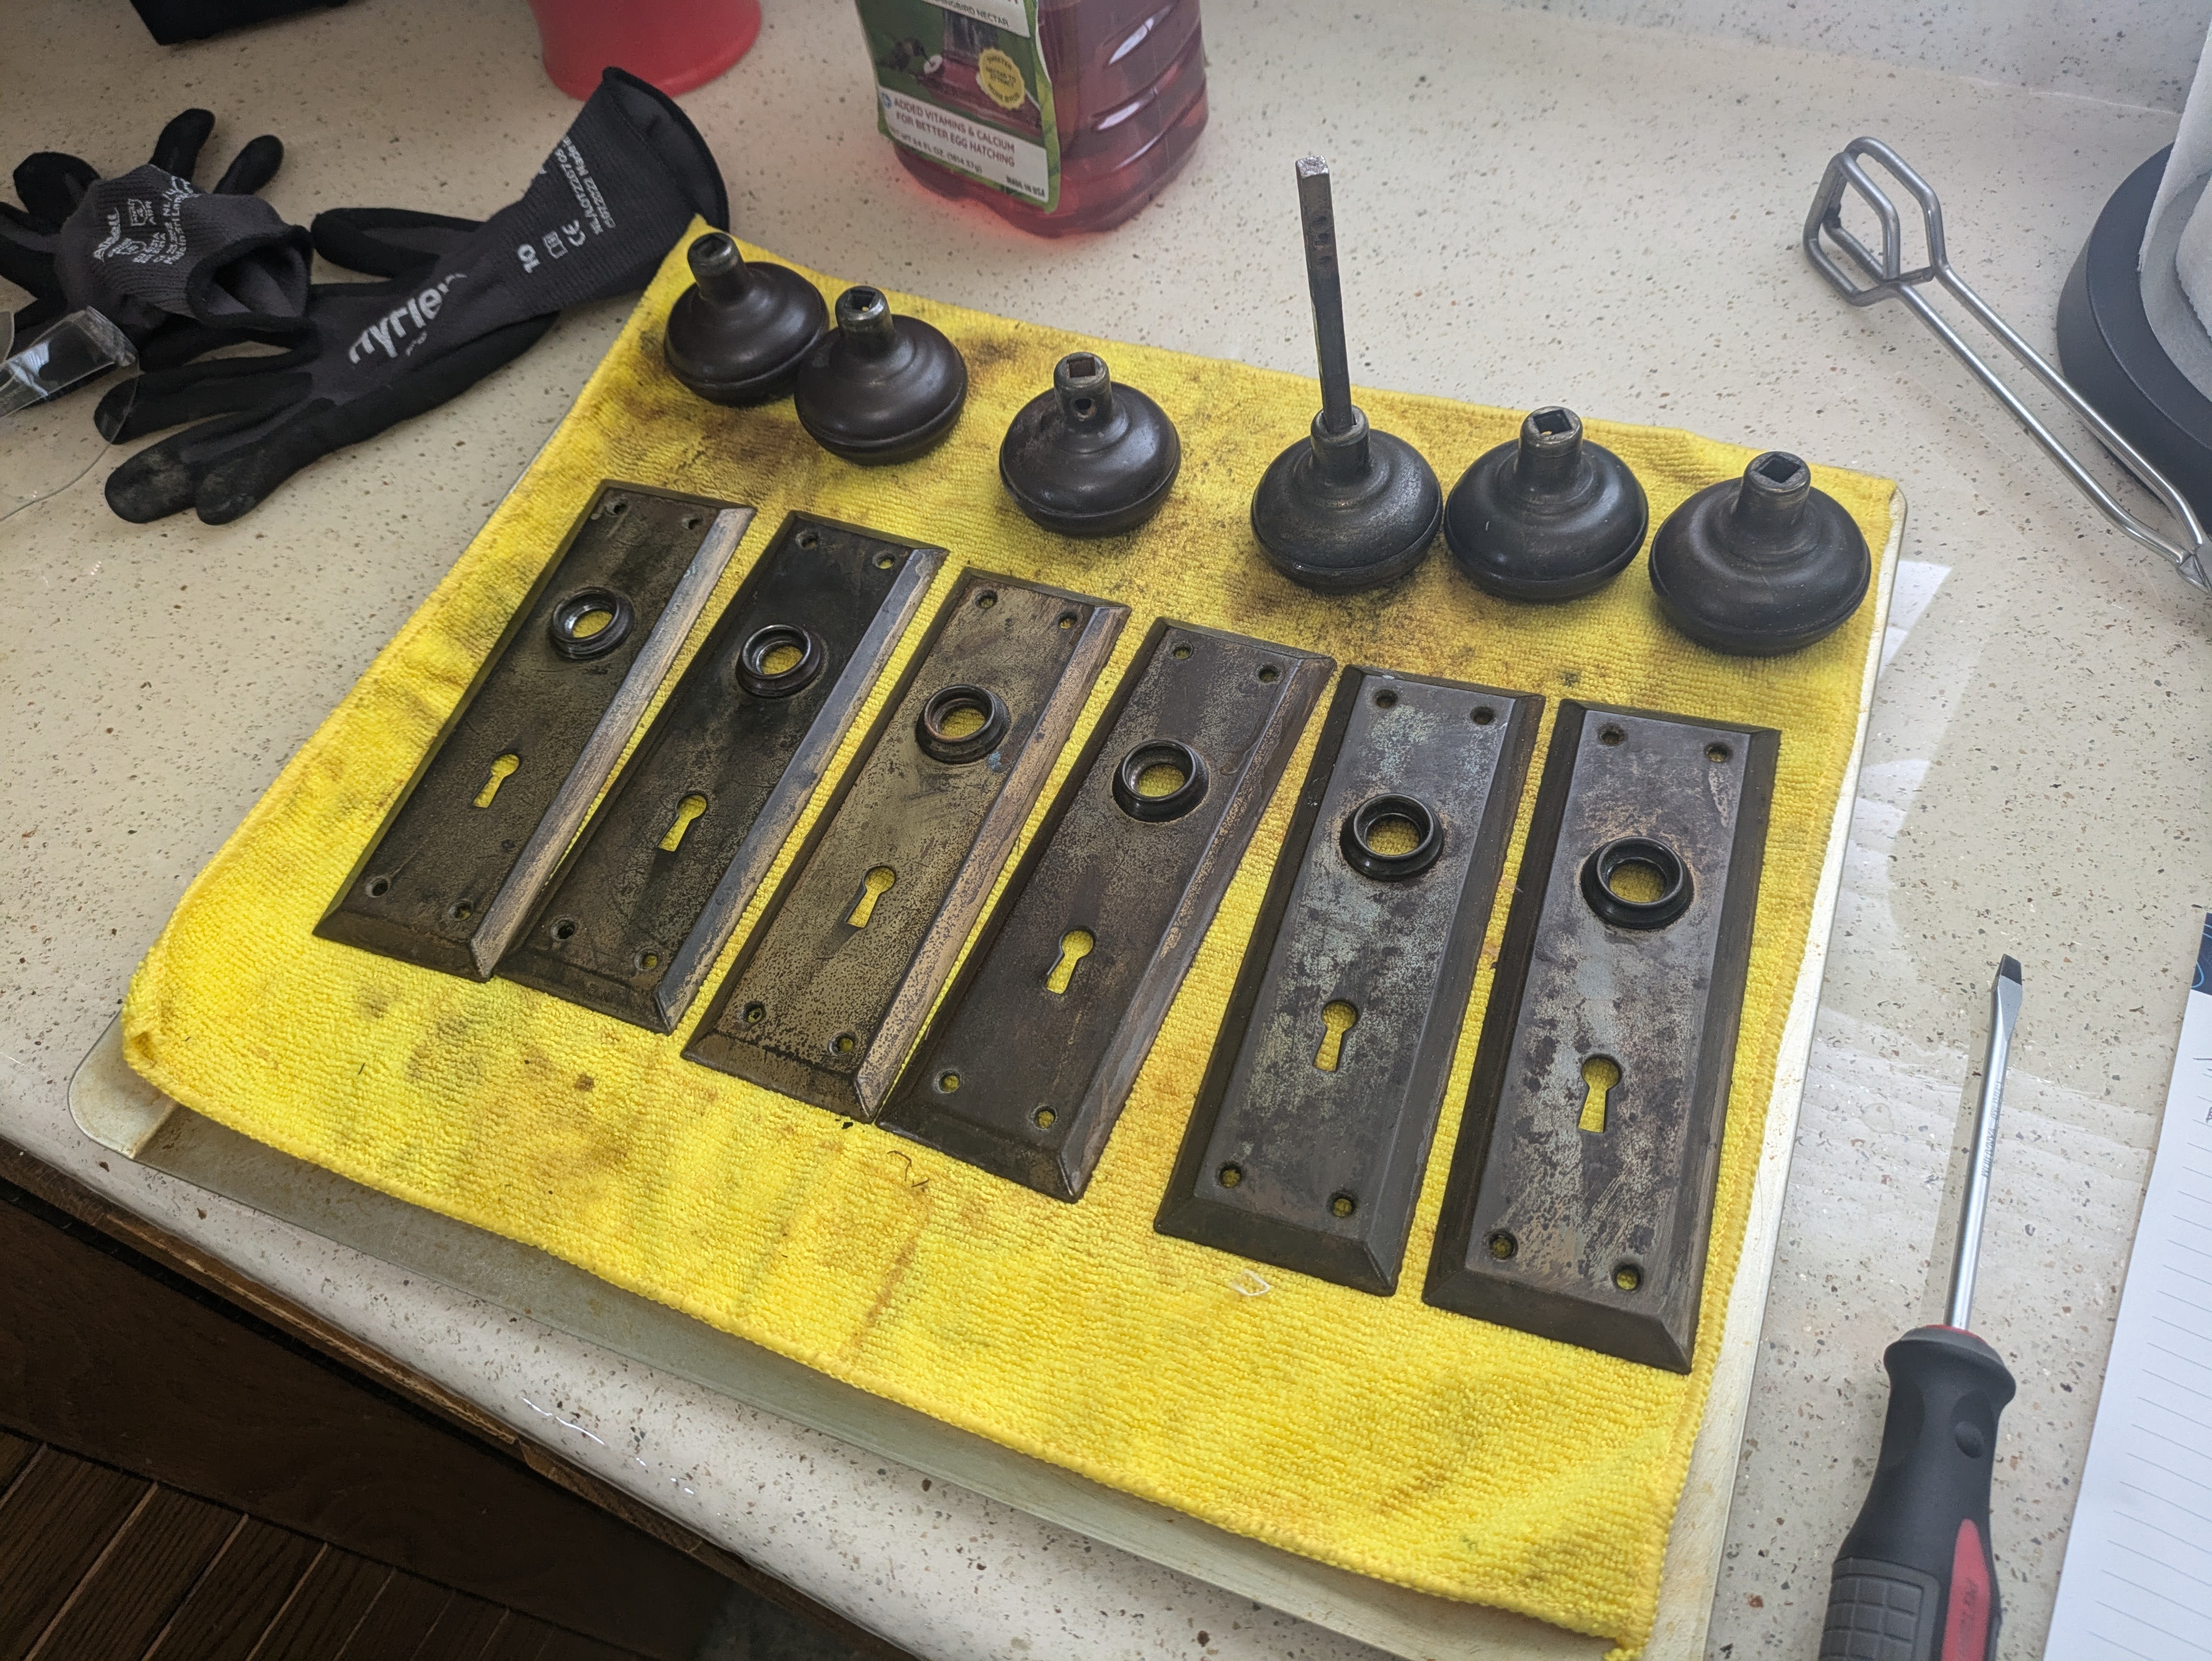
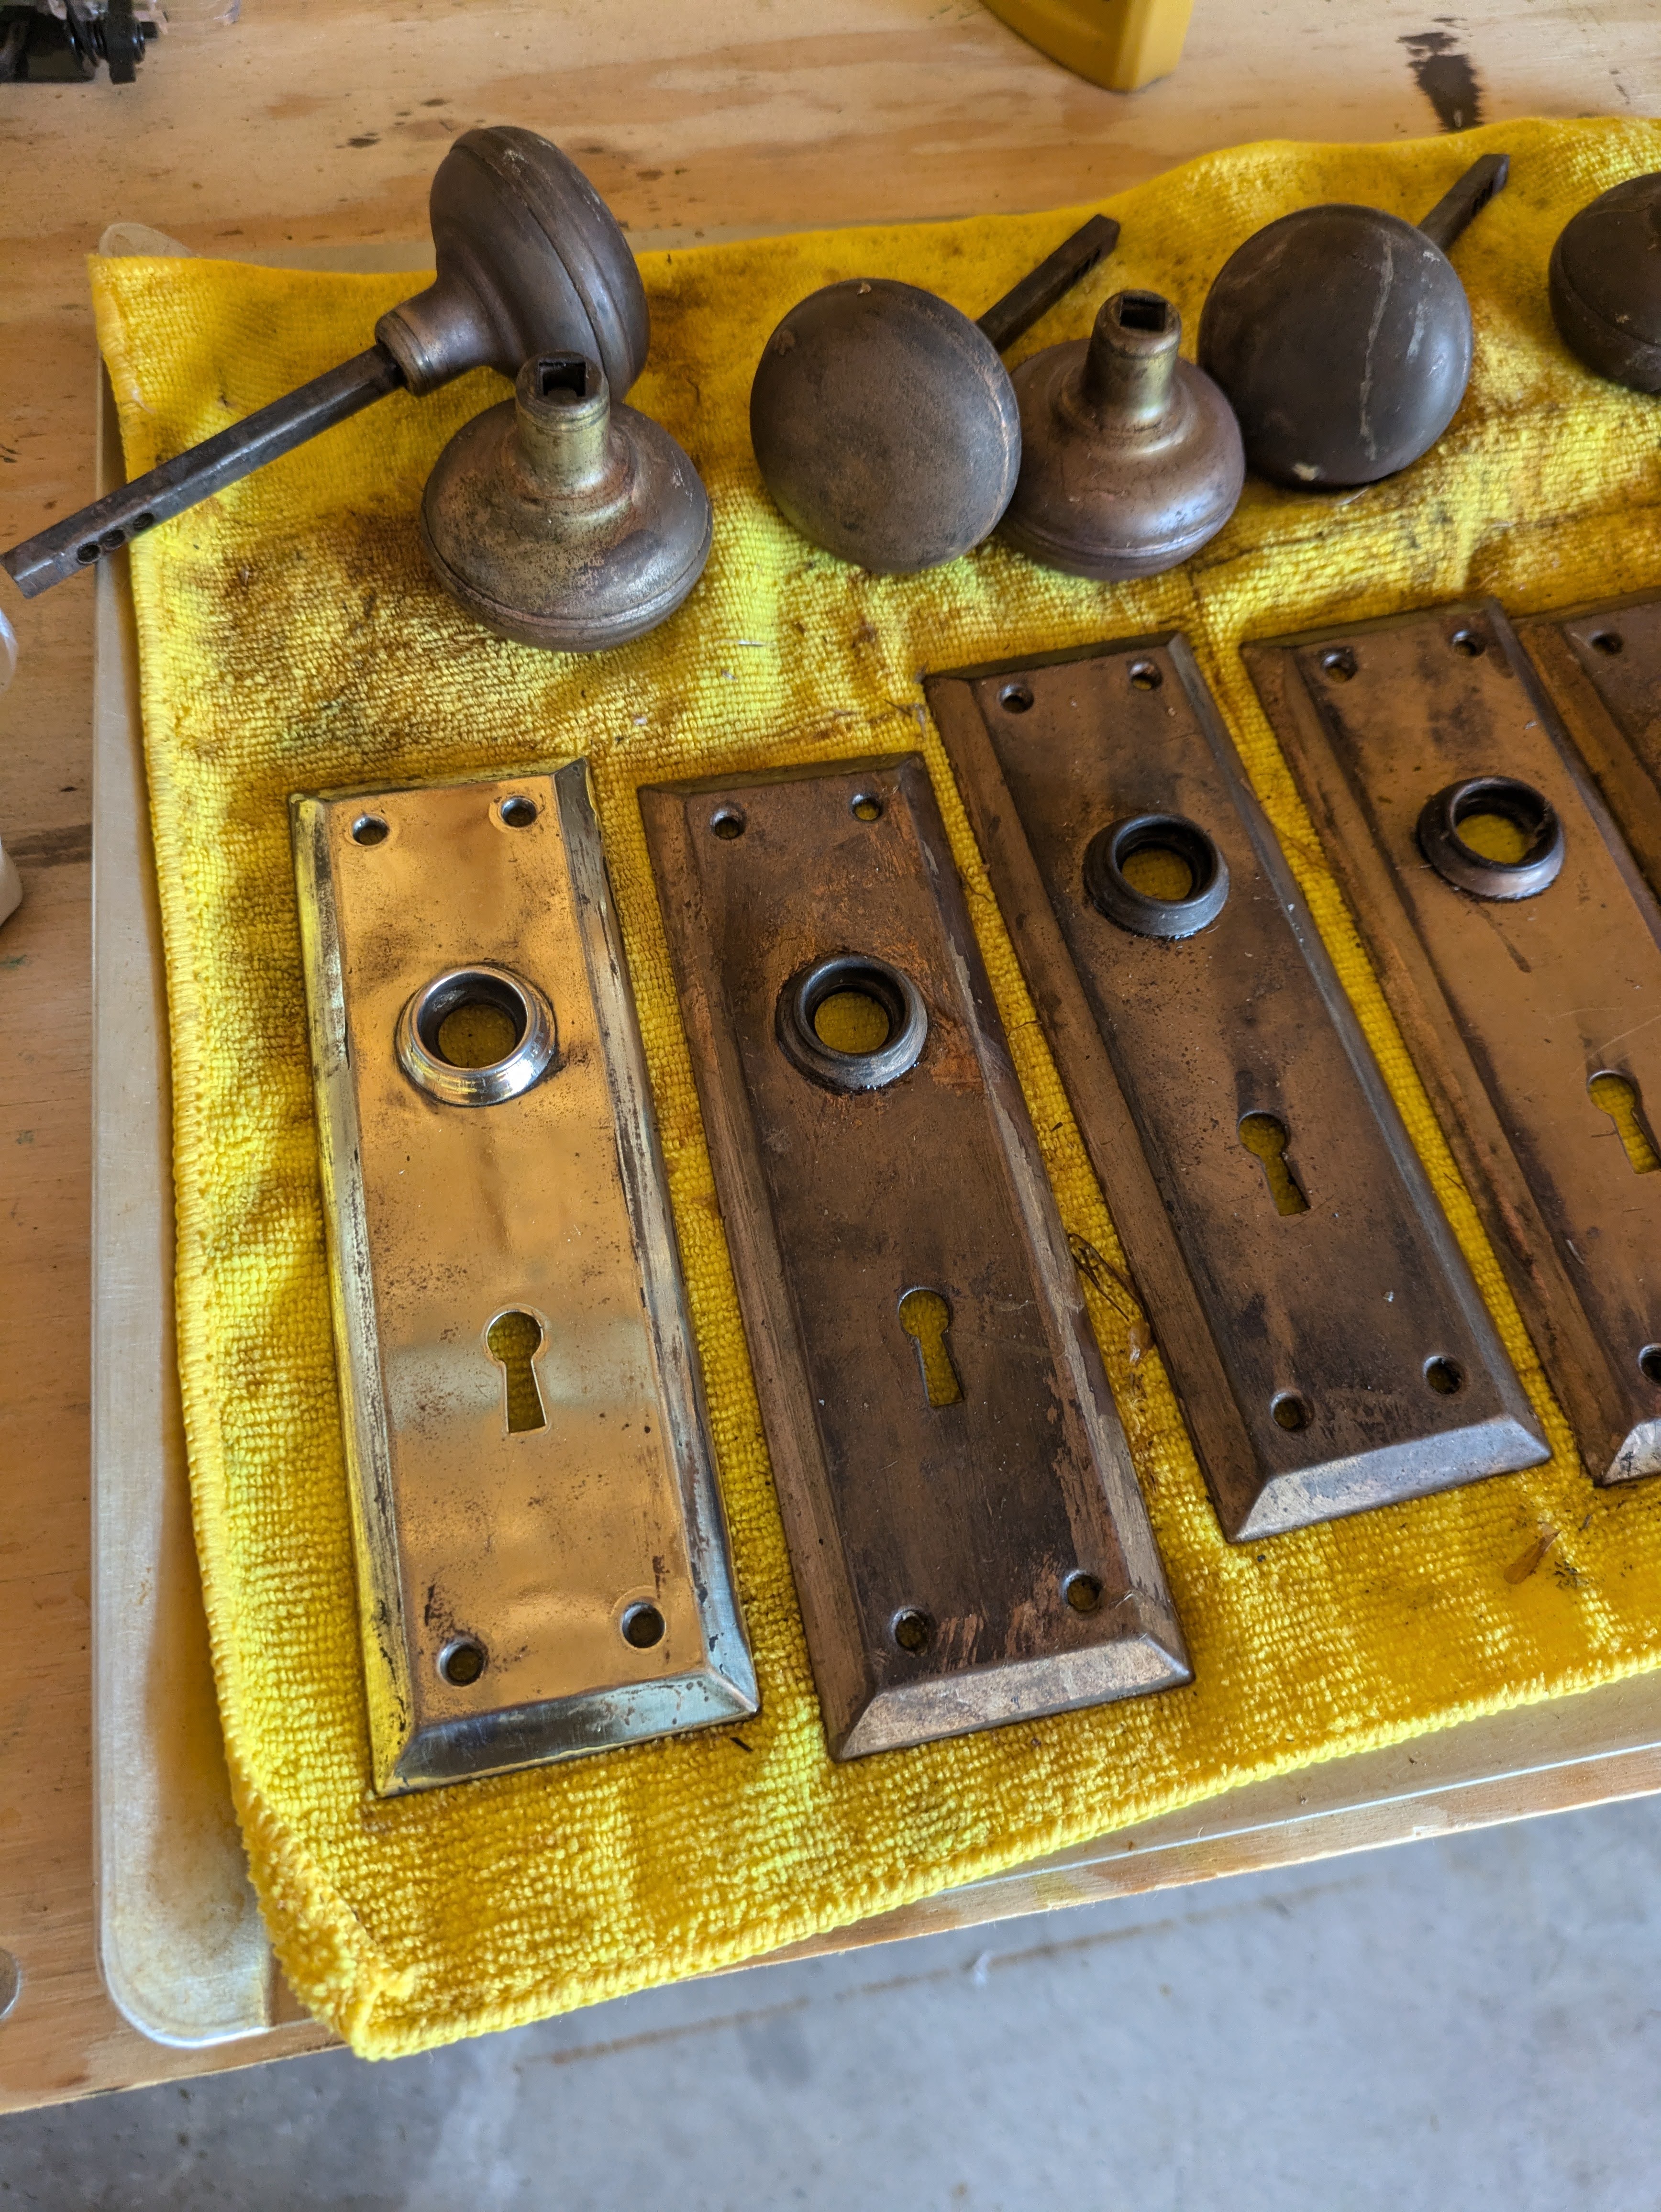
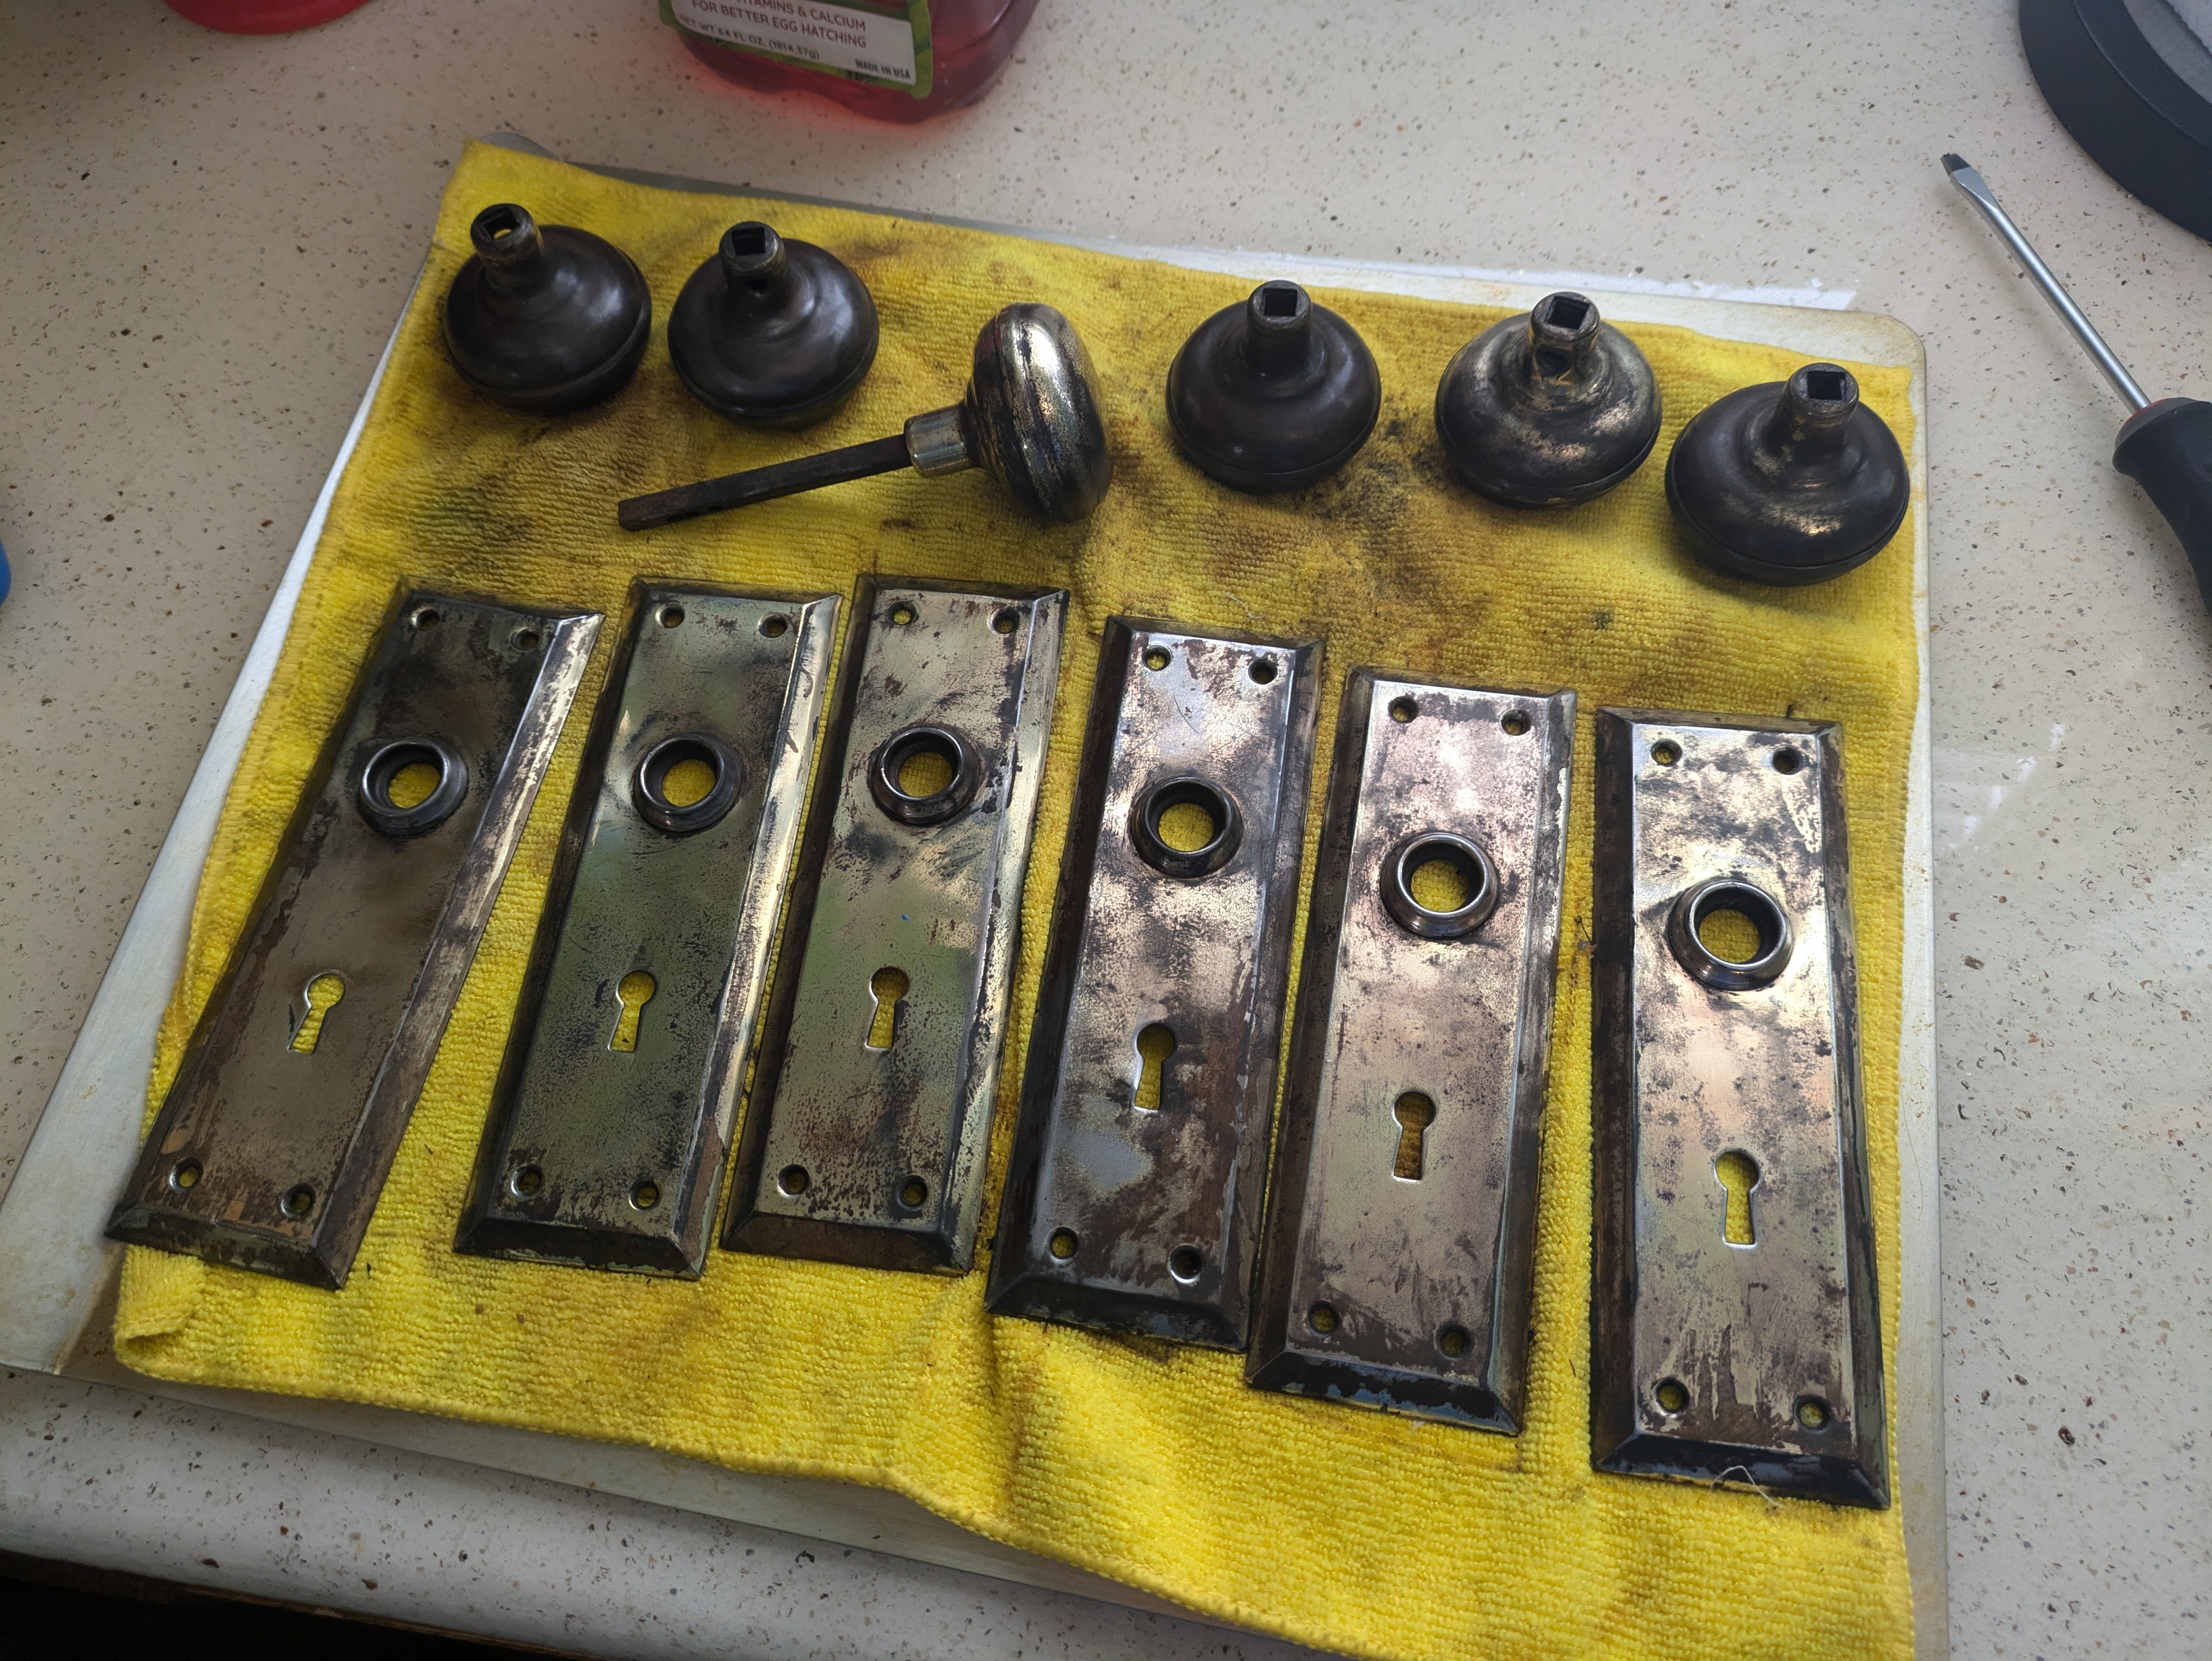
Next, put some vinegar in a pot and bring it to a boil. Once it’s boiling, put the hardware in the pot with the tongs. Let it sit for two to three minutes before taking it out. Be sure to empty the doorknobs of any liquid vinegar that may be inside. Getting burned with boiling hot vinegar later is not a fun surprise.
I found this tip online, and it does seem to help get the initial layers of gunk off. I recommend wearing safety glasses and a mask for this process, the boiling vinegar will smell terrible and hurt your eyes, like chopping an onion. After doing this, the hardware will have a matte copper color to it.
Next, start using the bench grinder with the polishing wheels. I found the orange wheel with a little bit of the green compound worked best. Don’t use too much of the compound as you’ll have to wipe it off. I found two dabs of compound on the wheel was usually sufficient for each faceplate. Work slow and methodically, it’s easy to wear through the brass plating. I highly recommend wearing gloves and safety glasses for this, you’re putting a lot of energy into the hardware and it will heat up significantly. Normally you shouldn’t use gloves with rotary tools, but the wheels are soft and it’s hard to hurt yourself with them. Hold on tight to the knobs, it’s easy to let them get away from you and go flying.
I found that roughly it would take me about 10 minutes to do each faceplate, and a few minutes per knob, so budget time accordingly. It may take longer depending on how much of a perfectionist you are.
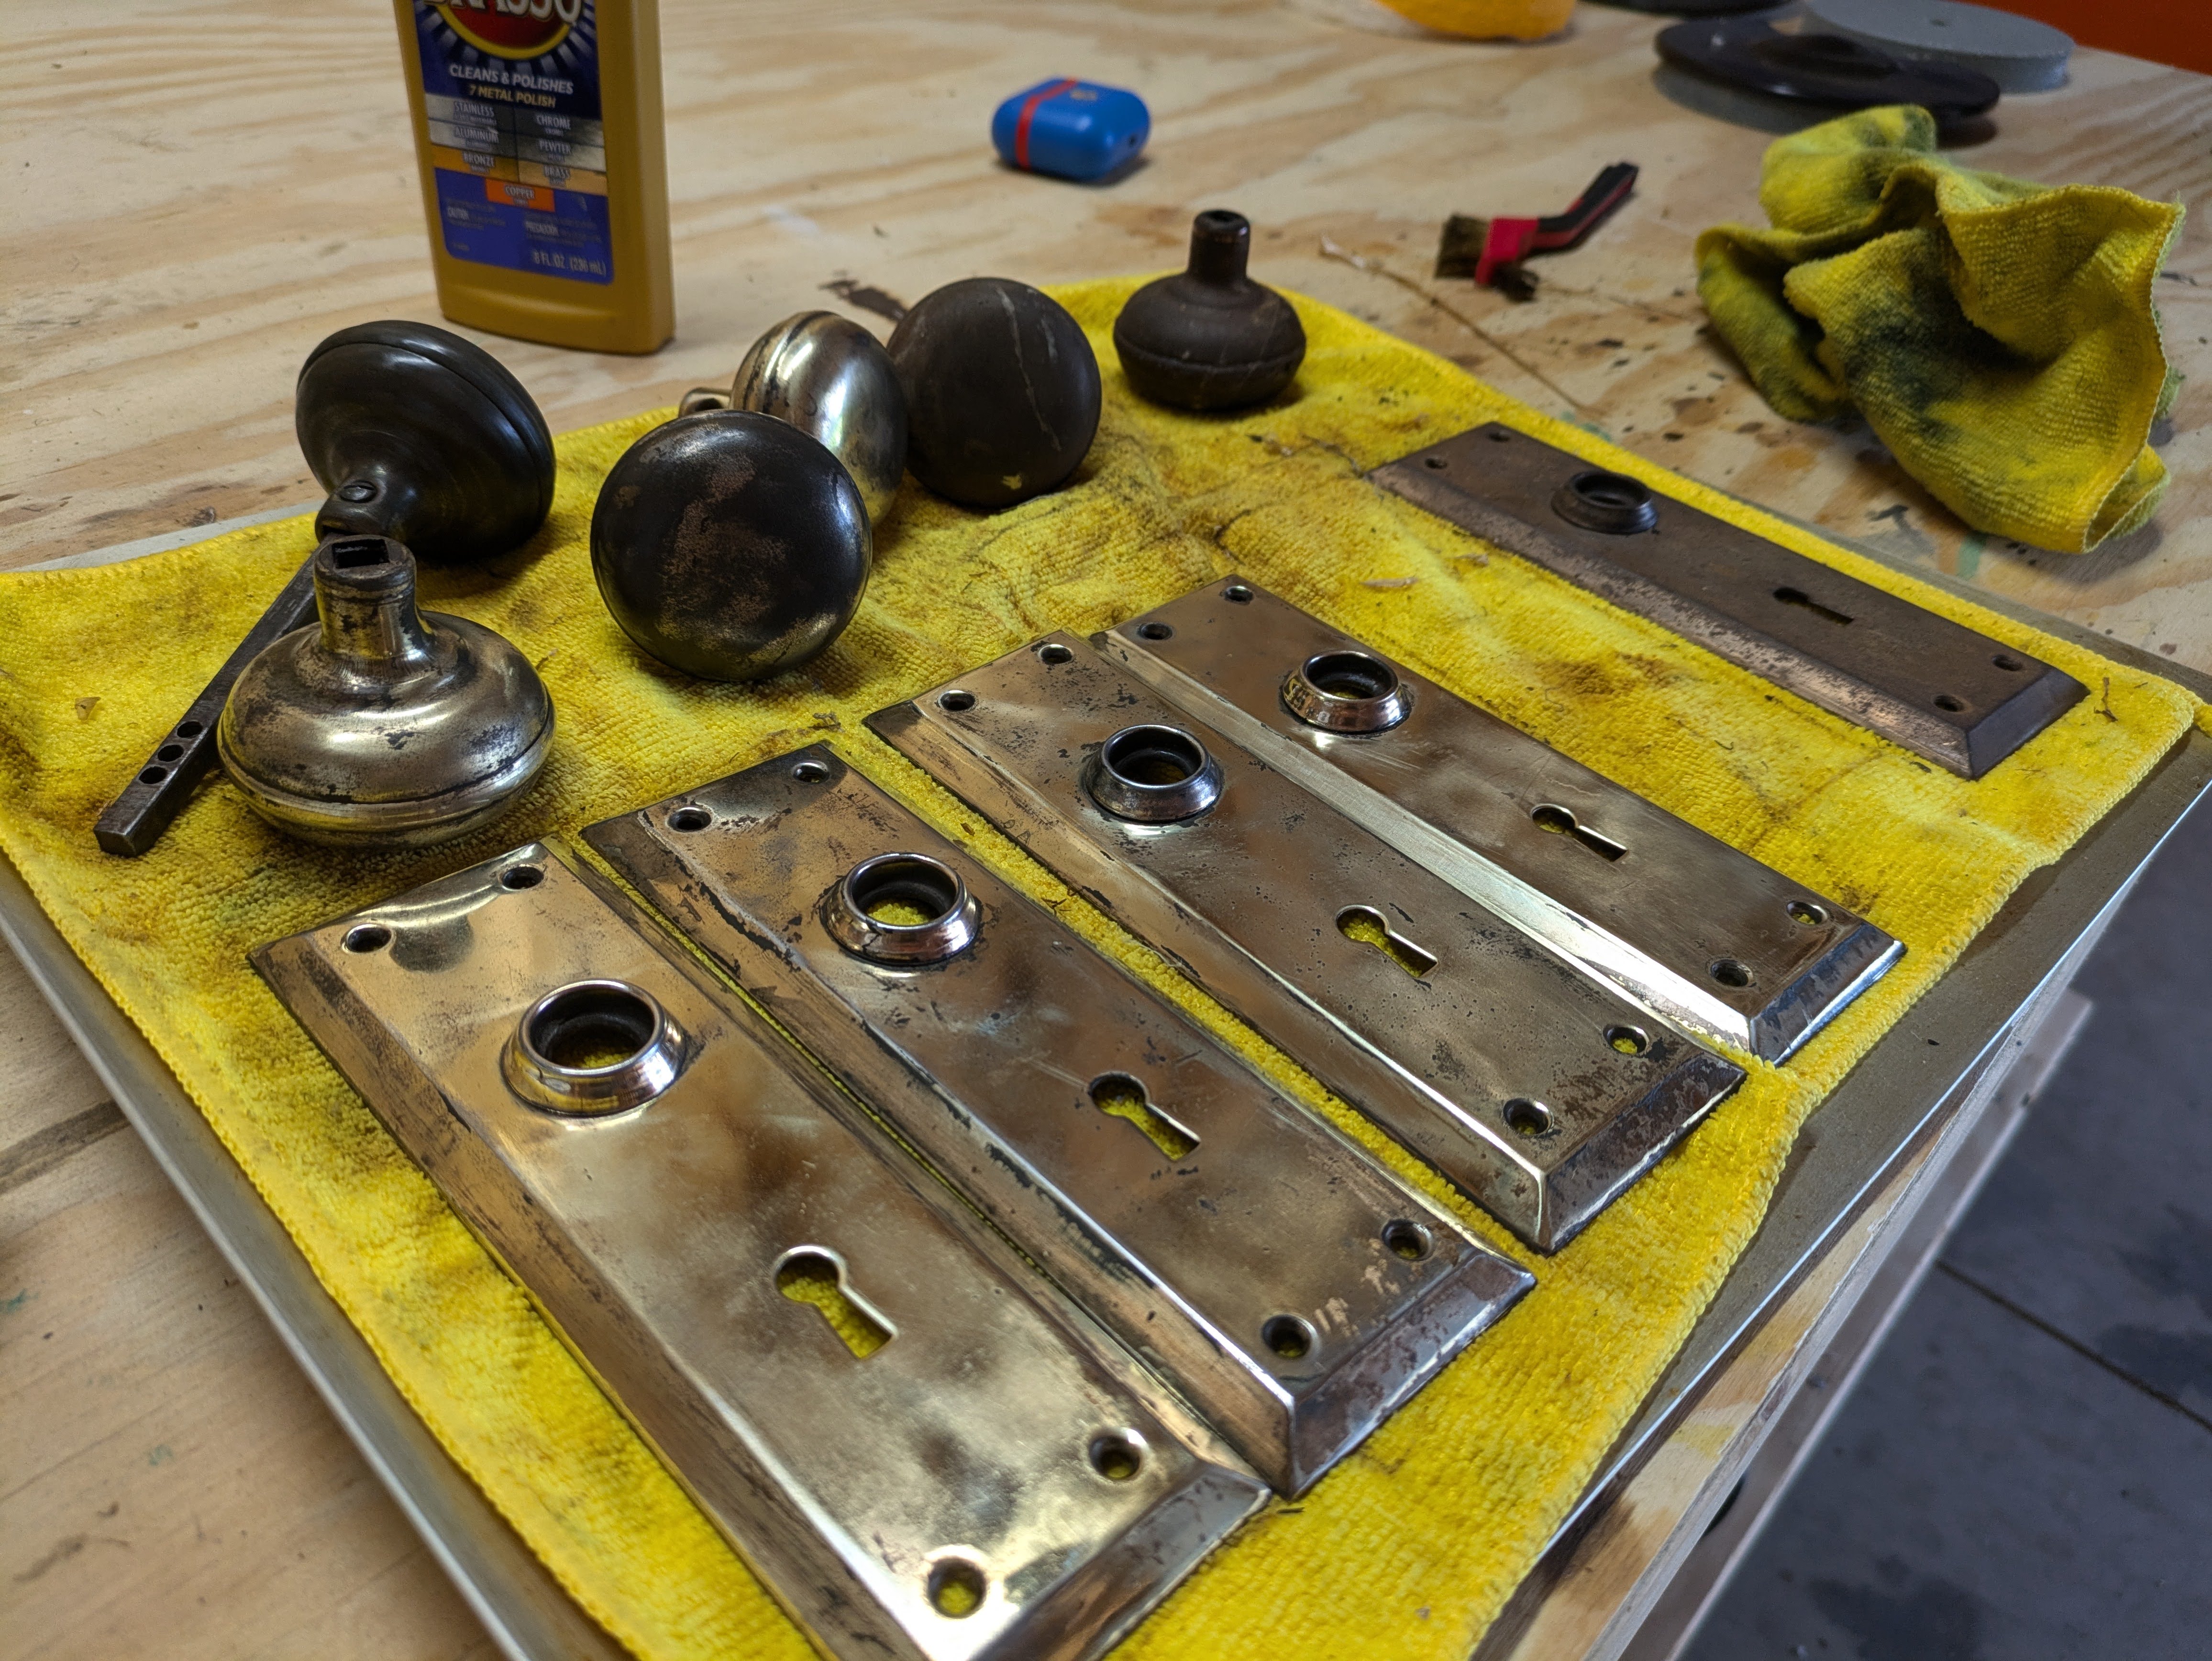
Hand polish some of the hard-to-reach areas with the Brasso and a microfiber cloth, and wipe off the compound. When you’re done, put the hardware back on the door in reverse. Be sure not to cross thread the door knob screws, I found that easy to do. Flip which side the faceplates and knobs are on to taste.
Like I said, this is not a magic bullet. While the above set of hardware came out really well, the below set had more mixed results.
Conclusion
While not perfect, I think it looks better than it did, and it was far cheaper than buying replacement hardware, even cheap stuff when multiplied by the two dozen doors in my house.
If you’re more adventurous, you could potentially try DIY re-plating hardware as this video shows, but it does seem it may take away some of the mirror finish that this retained.